
To get the bars to settle, the only way I know is to go drive it over lots of rough roads and bumps, and make steering maneuvers. Just sitting it will never settle because the weight of the truck won't move he tires outwards to allow the arms to come down. You need to try and get the alignment close, so you can drive it a day or so before you get it to the alignment shop.
ITGuy's 2003 Sierra 1500/2500 4x4 RCLB Build Thread
- Thread starter ITGuy
- Start date
You are using an out of date browser. It may not display this or other websites correctly.
You should upgrade or use an alternative browser.
You should upgrade or use an alternative browser.
To get the bars to settle, the only way I know is to go drive it over lots of rough roads and bumps, and make steering maneuvers. Just sitting it will never settle because the weight of the truck won't move he tires outwards to allow the arms to come down. You need to try and get the alignment close, so you can drive it a day or so before you get it to the alignment shop.
This x2
Sent from Tapashit
bars normally dont settle much if they are used bars, if they were brand new i could see them settling.
just a question, did you put them back on the same side facing the same direction as you pulled them out?
i know racecar wise torsion bars dont like to be reversed.
just a question, did you put them back on the same side facing the same direction as you pulled them out?
i know racecar wise torsion bars dont like to be reversed.
Yeah they are marked with a L & R and a small direction sign for rotation on the back.
I did double check them, and I verified the R was on the passenger side.
Do Not Want Broken / Warped Torsion Bars.
A little research turned up the following:
Sample measurements Based off a 2006 Chevy 2500HD
Front center hub to fender - 28.5"
Rear center hub to fender - 44.5"
[I prefer this emasurement as it ignores tire size]
My front center hub to fender is about 32" sitting on the adjuster blocks.
I had those Cognito Keys cranked almost to stock location at first, and the truck was over 6"+ inches of lift in the front, almost to max travel height.
So tonight I will work my way through the list and torque a few more things into place while continuing charging the batteries.
Last edited:
I am also going to pop the ball joints out of the spindles and re-crank them properly.
I have very stiff knuckles, extremely hard to turn by hand. I may have not seated them properly.
I'll go through, pop them off, and then re-tighten from the bottom up and make certain they are moving properly. I'll do this over the next few days before I put the new calipers and brake lines in. Would rather be safe than sorry.
Last edited:
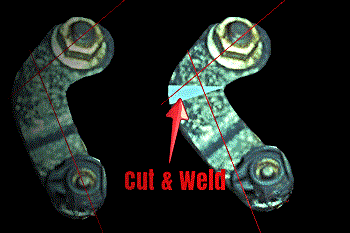
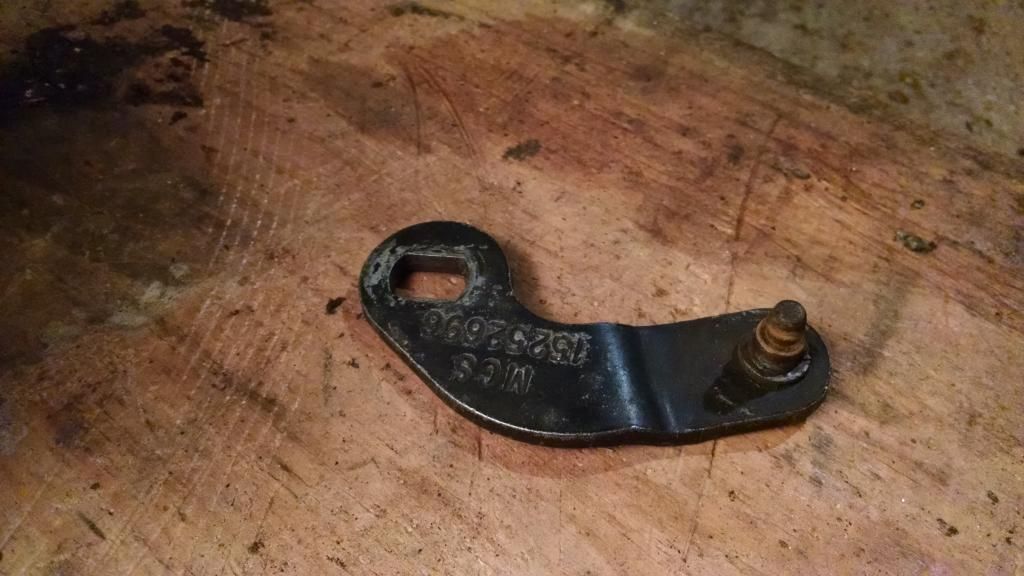
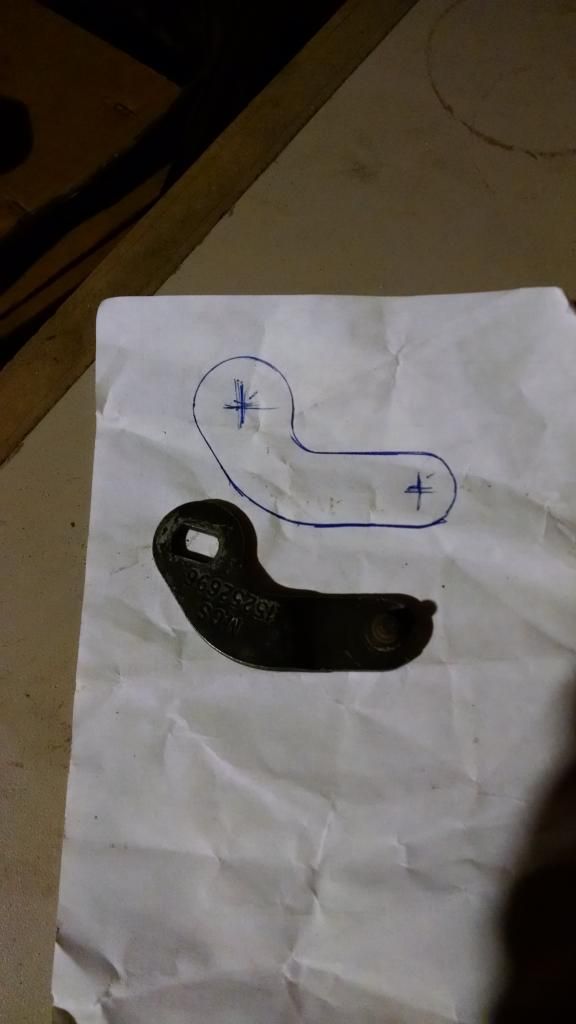
Allison Transmission Shift Linkage / Shifting Arm Mod.
I marked up this image for a before and after. I am pretty much set on moving forward with this mod to use the Cognito Allison transmission mount [6spd] I purchased and installed.
I'll remove the arm from the shifting cable (small clip holding the assembly together. I already have it unbolted from the transmission.
I am then going to cut the bracket [in picture] and create an angled gap. It needs about 1/2" extra travel or so [I'll get the exact amount used by the arm to shift the tranny.]
I'll weld some steel / filler back into the joint and then grind / paint the modded arm. I am not going to wait around just to find out I need to put my stock bracket back on.
The reason for doing this : I want to use the new bracket as it does have better clearance.. seems it was designed for a 2007.5.
I am assuming it is not needed for the 2007 LBZ classic down.
Hope to have this completed Thursday night. It will be one of the last steps, pending any other changes.
Last edited:
if that doesnt work and you need something made, let me know, i can make you something out of stainless.
if that doesnt work and you need something made, let me know, i can make you something out of stainless.
Will do, but this bracket should cleanup. Seems to be in good shape. I'll keep that in mind for future parts though.
I will be sure to add enough material to it so that I can re-tension my cable... right now it's maxed on the slack.
Progress.
- Front shocks torqued top and bottom
- Sway Bar Links torqued Top and bottom
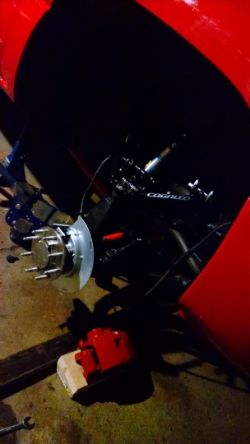
- Removed front tires, rotors and calipers again to check knuckles. Right side has loosened up a little already.
- Charged the batteries for a couple more hours. Started the truck up, first time since late July :clap:
- Adjusted Right tie-rod and left it a little loose to make some final tweaks.
- Soaking left tie-rod and will try to break it free in a few minutes, it was being stubborn.
- Tightened exhaust above torsion bar cross member
Also received a few goodies on the porch
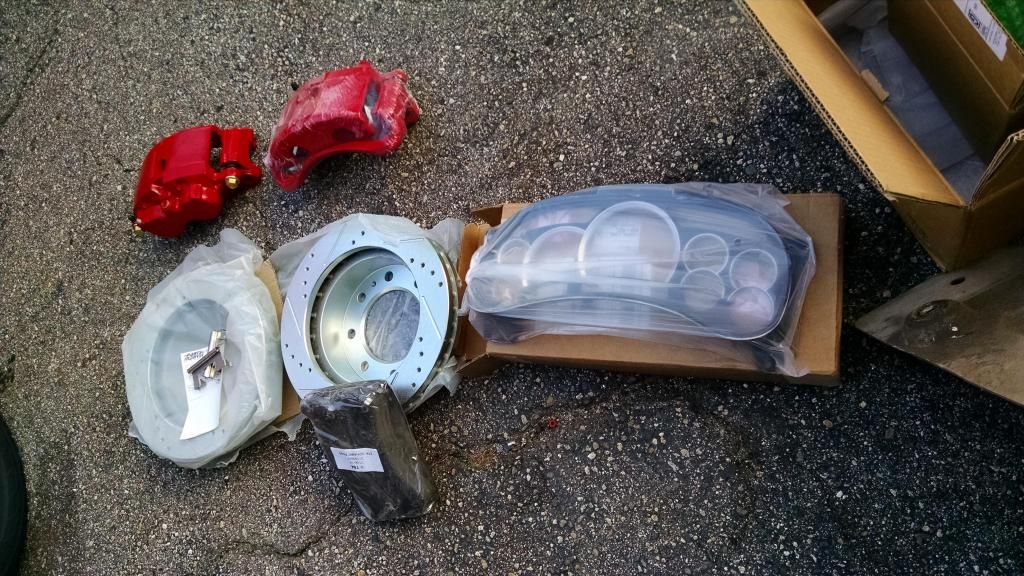
Rotors
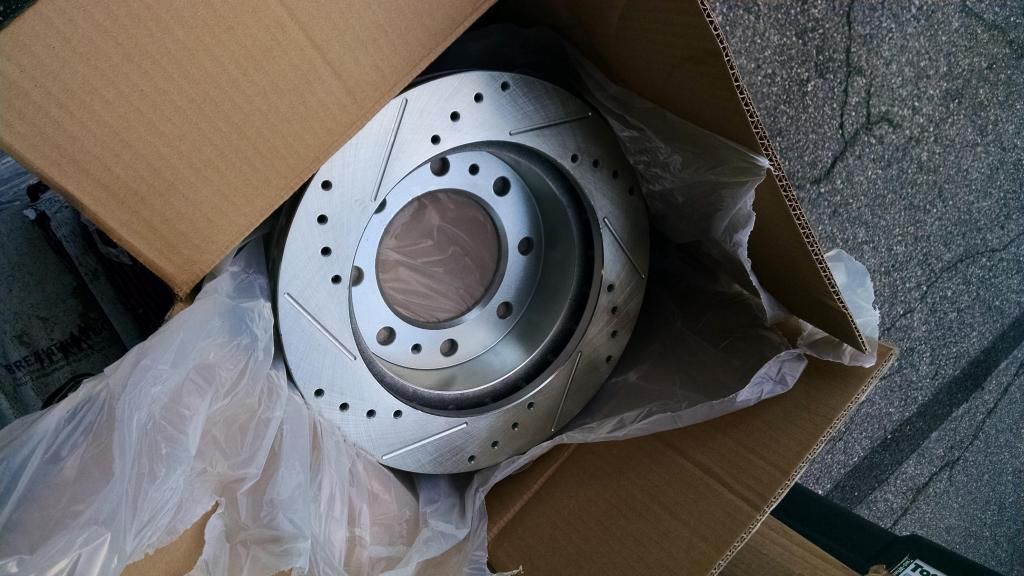
Brake pads
Calipers
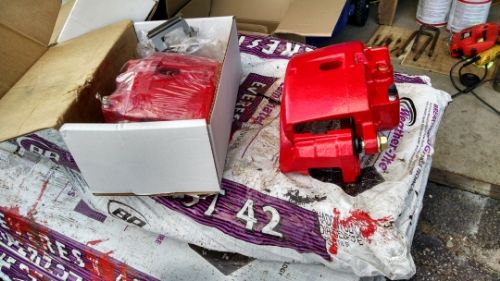
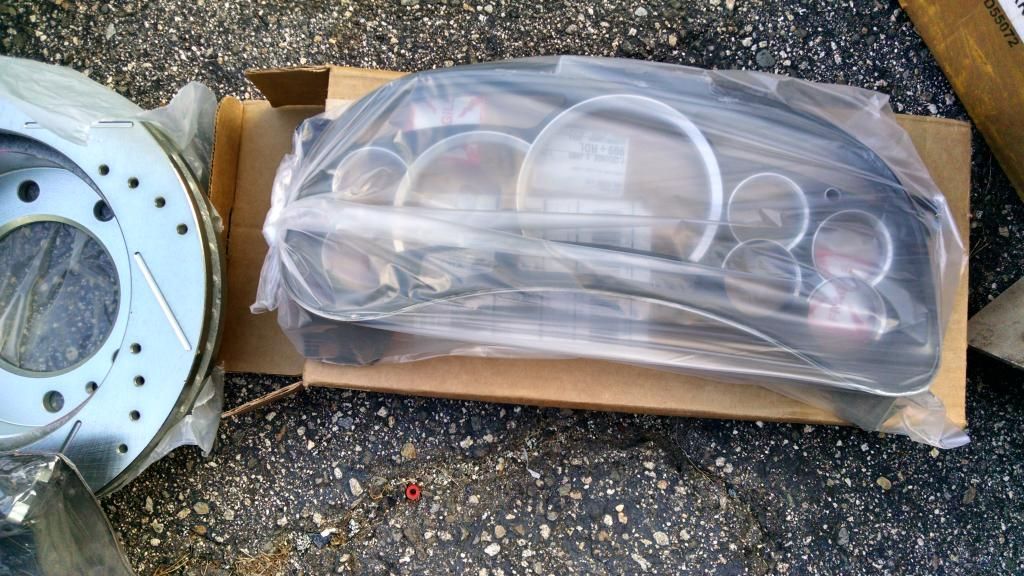
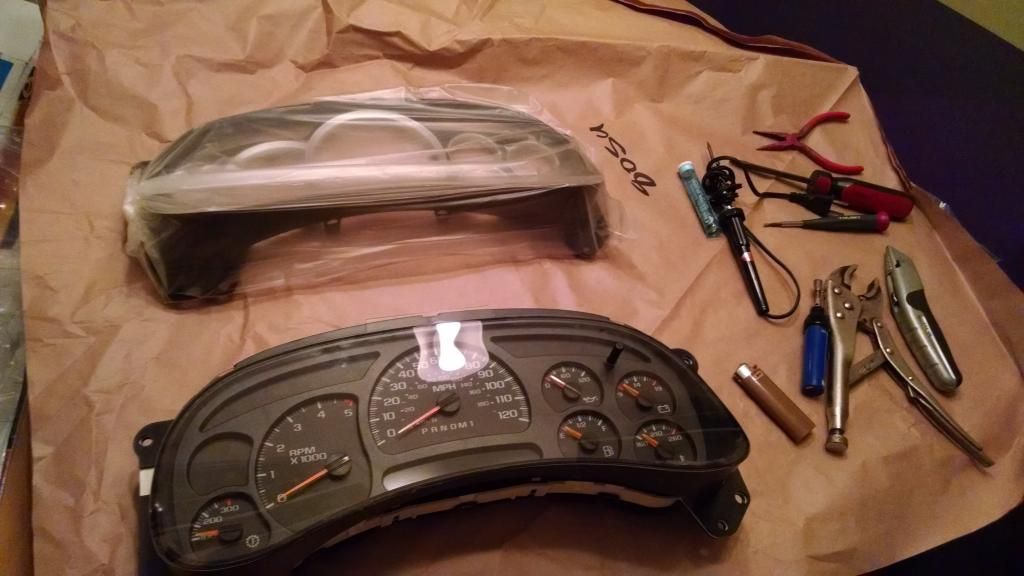
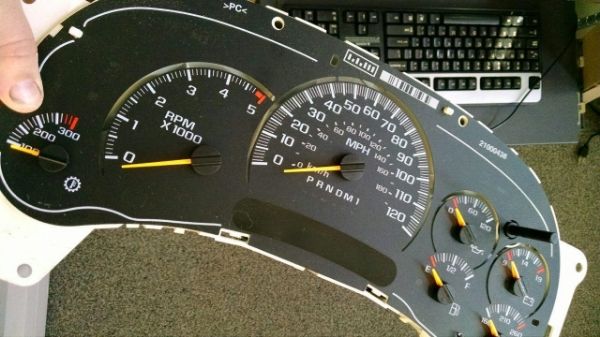
Bezel for my gauge rebuild project.
- Front shocks torqued top and bottom
- Sway Bar Links torqued Top and bottom
- Removed front tires, rotors and calipers again to check knuckles. Right side has loosened up a little already.
- Charged the batteries for a couple more hours. Started the truck up, first time since late July :clap:
- Adjusted Right tie-rod and left it a little loose to make some final tweaks.
- Soaking left tie-rod and will try to break it free in a few minutes, it was being stubborn.
- Tightened exhaust above torsion bar cross member
Also received a few goodies on the porch
Rotors
Brake pads
Calipers
Bezel for my gauge rebuild project.
hngg dat cluster overlay and dem d&s'd rotors. dfw. As Malik once said to Cornell,
:clap: :shake:
Your attention to detail/willingness to do any-fucking-thing yourself to your truck is inspiring too say the least
:clap: :shake:
That's it for tonight
Pulled the shifting bracket
I'll grind it up, cut it and weld it back together on Thursday.
Tightened a few bolts and wanted to go inside for the night.
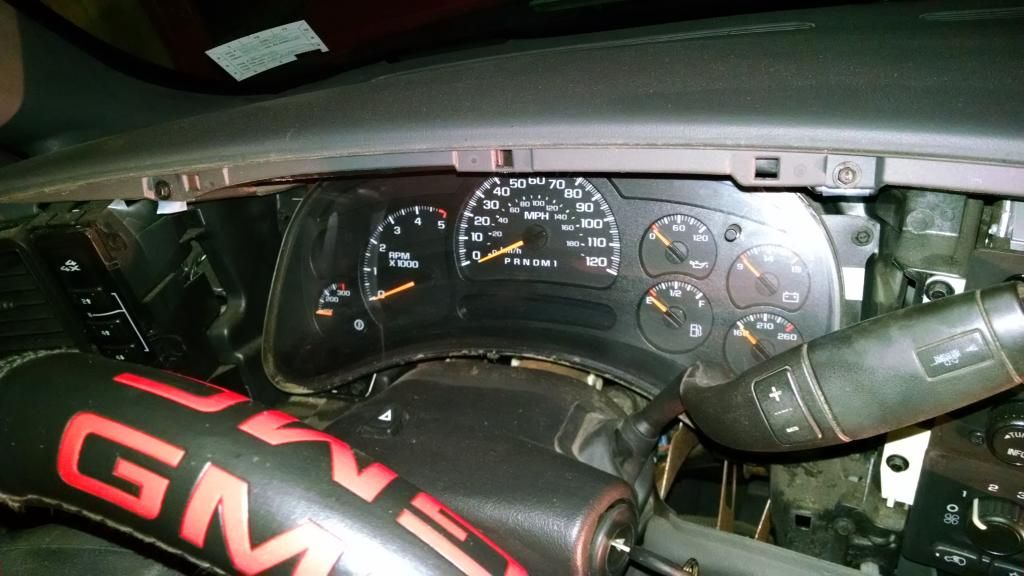
I usually catch a late show before bed, so I decided to remove my cluster and start the LED conversion on it.
Still waiting for my Black Cat face to arrive for it, but I can get everything else done.
So dirty, dusty for sitting so long lol.. definitely needs a good detailing inside and out when this is over.
Setting up
Pulled the shifting bracket
I'll grind it up, cut it and weld it back together on Thursday.
Tightened a few bolts and wanted to go inside for the night.
I usually catch a late show before bed, so I decided to remove my cluster and start the LED conversion on it.
Still waiting for my Black Cat face to arrive for it, but I can get everything else done.
So dirty, dusty for sitting so long lol.. definitely needs a good detailing inside and out when this is over.
Setting up
hngg dat cluster overlay and dem d&s'd rotors. dfw. As Malik once said to Cornell,
:clap: :shake:
Thank you. I'll take that as a compliment.
Honestly, this isn't in the same class as some show trucks on here but it's mine, and I enjoy the little details.
I do post a lot though... maybe I can just combine multiple postings.
Nice progress Ryan.
I had a Black Cat overlay in my NNBS for a while, they're definitely quality... you should be happy with it.
I had a Black Cat overlay in my NNBS for a while, they're definitely quality... you should be happy with it.
hopefully you are doing led strips, scotty has had much more success with them then normal bulbs.
i know my cluster, and my hvac are led strips the rest he said he had a hard time getting them to fit into it without interfereing with the buttons and still giving good output.
i know my cluster, and my hvac are led strips the rest he said he had a hard time getting them to fit into it without interfereing with the buttons and still giving good output.
Na, just got some dim-able blue LED's. Maybe I will hold off and install the strips for more light.
I don't want any weak spots /spotting going on. I could always use these LED's in the other areas.
It's easy either way.. I don't mind waiting to ship some more.
[EDIT]
Nick Martin over @ Cognito Motorsports sent me this message today in regards to the Allison 6spd transmission mount
"The bracket is designed to work with a different shift arm. So take that bracket off and put the stock one back on and you should be fine"
I am not going to put the stock back on though.. I am going to move forward with my shift arm mod.
Last edited:
Flex lines are in.
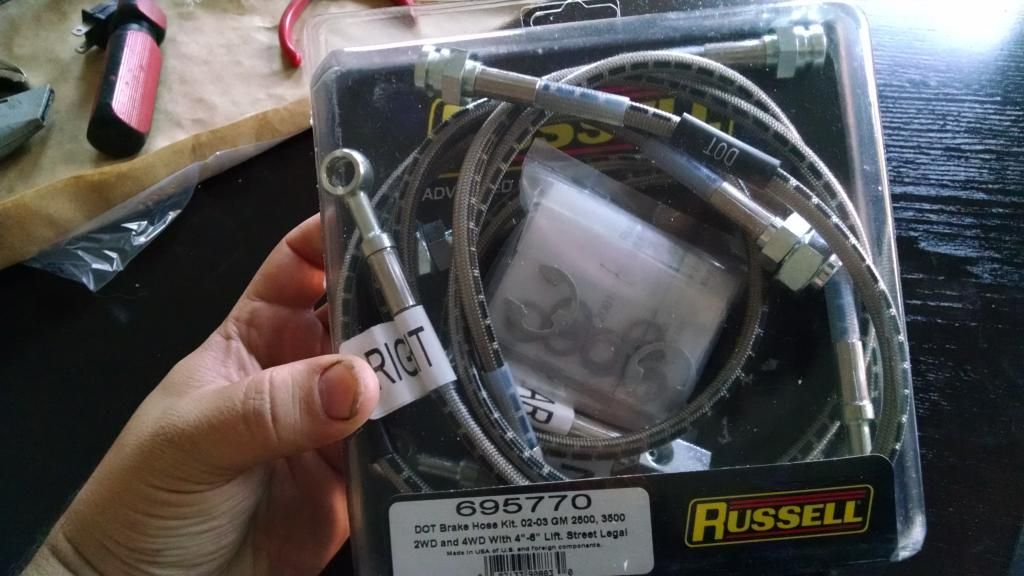
My coworkers looked at me funny when I walked in with this. I'll be soldering it up on my lunchbreak.
Move aside and let the man come through.
I'll be crushing [hopefully] a whole list of things tonight.
My coworkers looked at me funny when I walked in with this. I'll be soldering it up on my lunchbreak.
Move aside and let the man come through.
I'll be crushing [hopefully] a whole list of things tonight.