
ITGuy's 2003 Sierra 1500/2500 4x4 RCLB Build Thread
- Thread starter ITGuy
- Start date
You are using an out of date browser. It may not display this or other websites correctly.
You should upgrade or use an alternative browser.
You should upgrade or use an alternative browser.
I was going to cut them out of aluminum...however I stumbled across some small engine mounts that have a rubber bushing and aluminum caps.. That might work too. Hitting it hard after work tonight.. Going to be a nice weekend.
Are you getting a chrome pull for the tailgate handle, or painting door pulls red? Progress looks great
Are you getting a chrome pull for the tailgate handle, or painting door pulls red? Progress looks great
Not sure yet. Depends on other choices. I will leave them for now until I select rims + tires.
Also need to see how it looks with chrome grill vs. black/chrome hd grill.
the grill that came on the hd will look better, that was the only think i wasnt huge on with your 1500 was the chrome bars
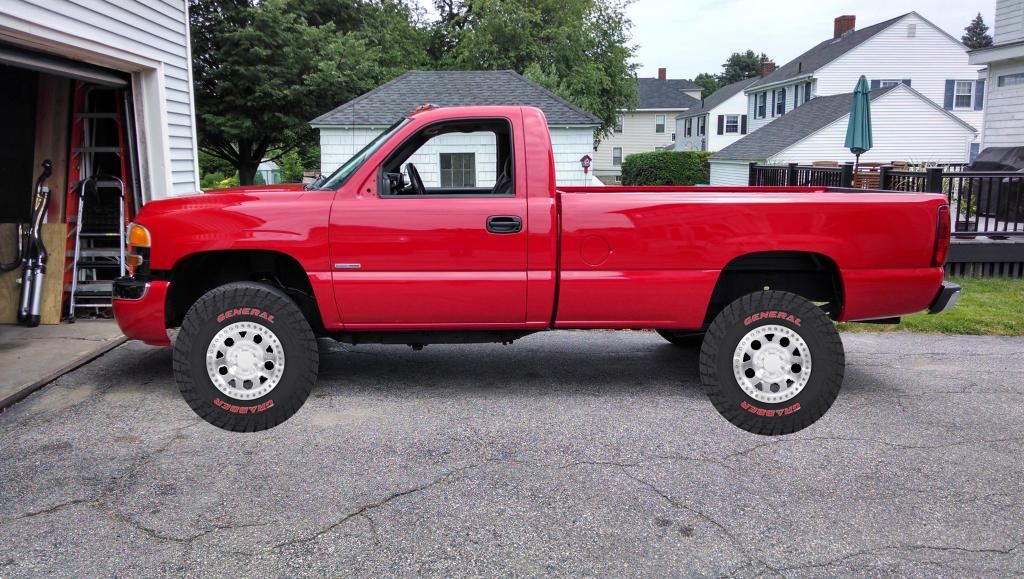
Just playing around with photochop. Looking for tire+rim combos.
Nothing great yet.
lol")
Na nevermind, prolly just delete this post. Just better off looking at them online... too much like work to photochop everything.
Nothing great yet.
lol
Na nevermind, prolly just delete this post. Just better off looking at them online... too much like work to photochop everything.
just playing around with photochop. Looking for tire+rim combos.
Nothing great yet.

lol
na nevermind, prolly just delete this post. Just better off looking at them online... Too much like work to photochop everything.
quoted before you delete this. You are on my level with ms paint
lol Just lazy today. I'm actually very good with photoshop.. but it would be annoying to do the same thing over and over.
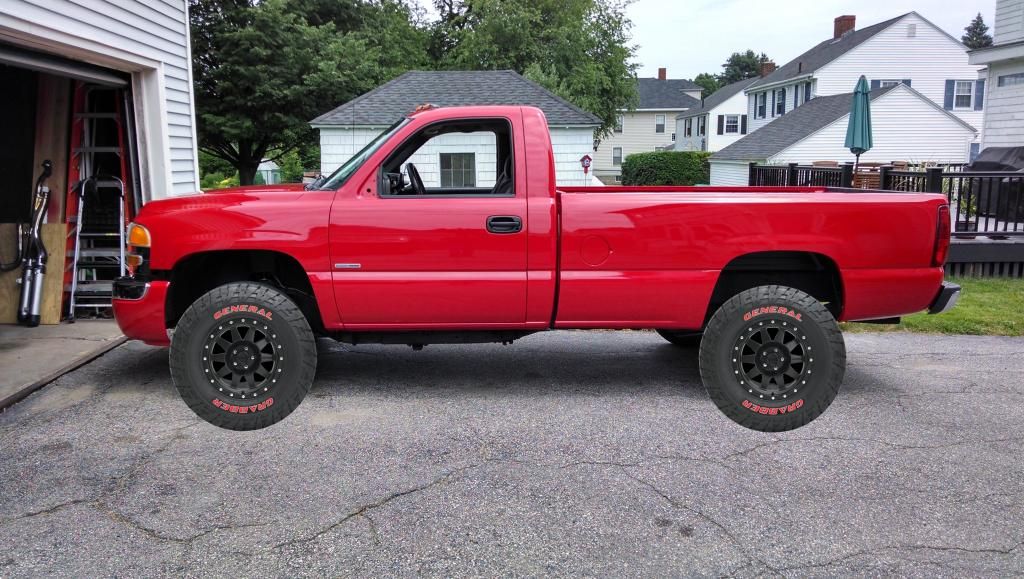
How about these

How about these
the grill that came on the hd will look better, that was the only think i wasnt huge on with your 1500 was the chrome bars
^this
x3
can't go wrong with machined methods on nbs trucks, ion 183s are nice too if you want to stay with a similar wheel style to the preds
Last edited:
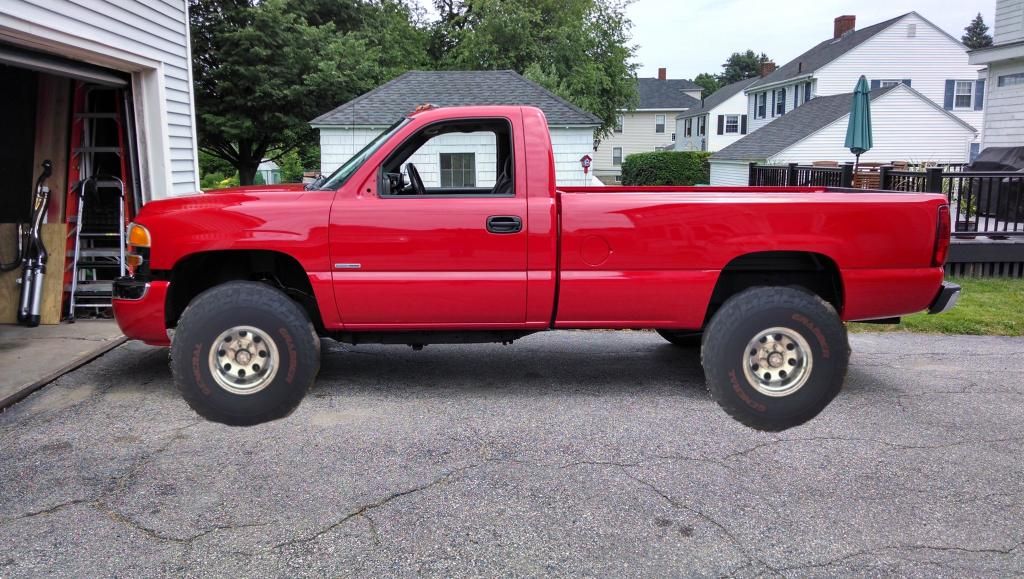
My original choice was machined 20x10 methods 8 bolt.. But Im still not certain ..same goes for the grabbers.. still need to grow on me. I'm still working on funding anyway. Even if I get all the parts, it takes a while to get it all bolted on. Especially with my frame cleaning / painting plans.
Good news is I think I'll have funding to finish the truck and add a few go fast parts real soon. Err..I hope.
Good news is I think I'll have funding to finish the truck and add a few go fast parts real soon. Err..I hope.
Last edited:
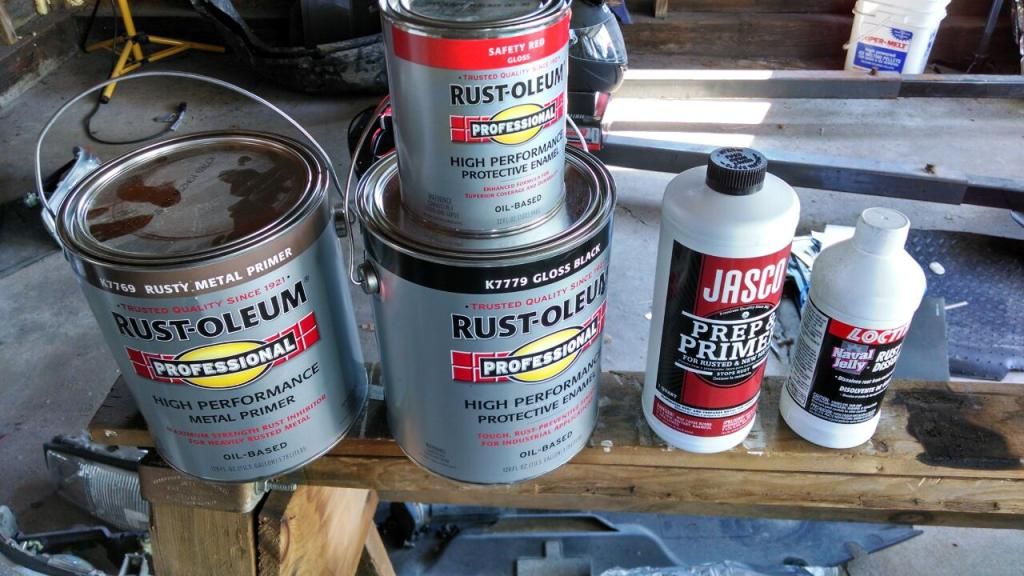
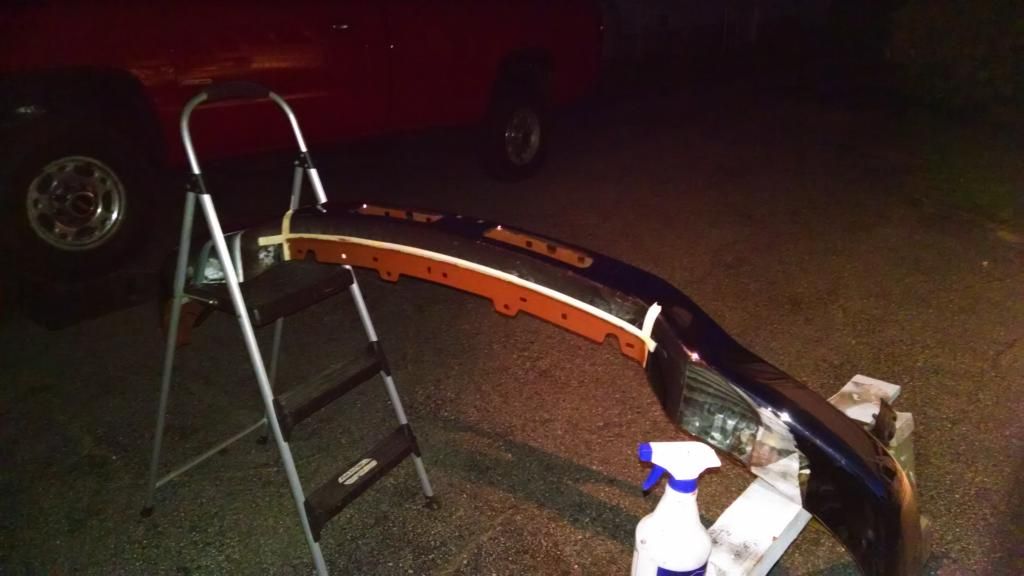
Products I am using on the parts I remove.
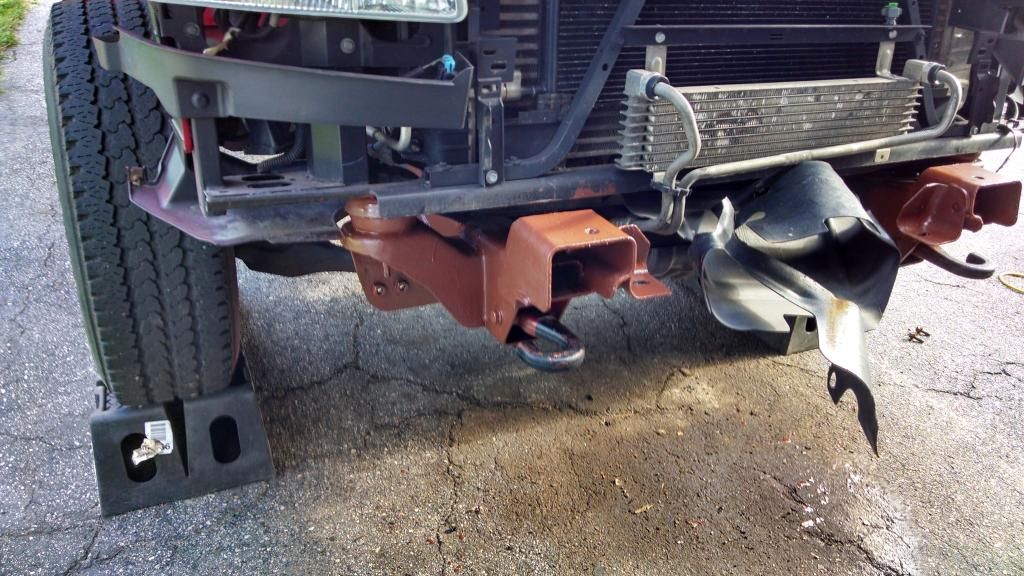
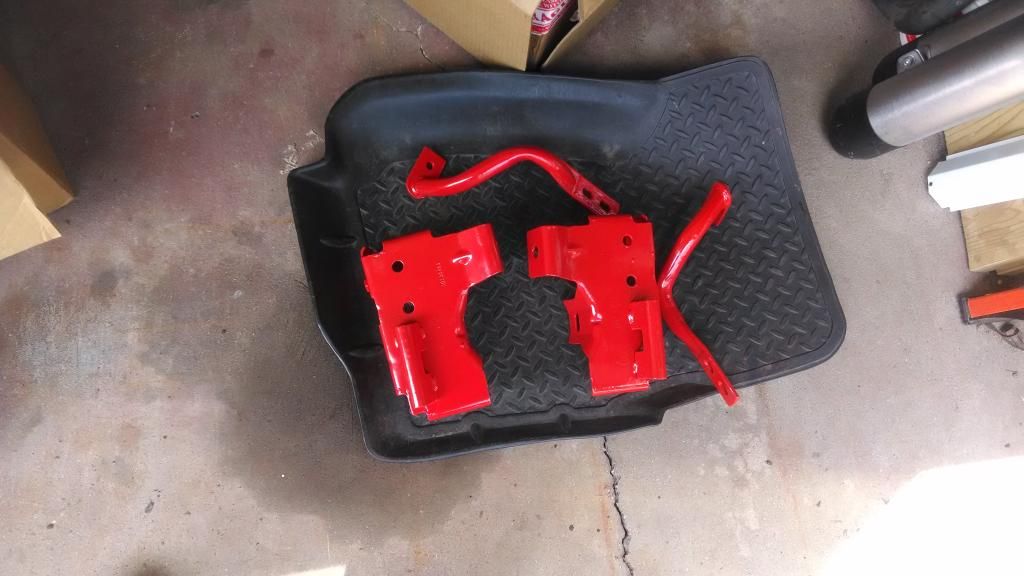
Removed brackets off the upper/lower bumper. Ground rust.
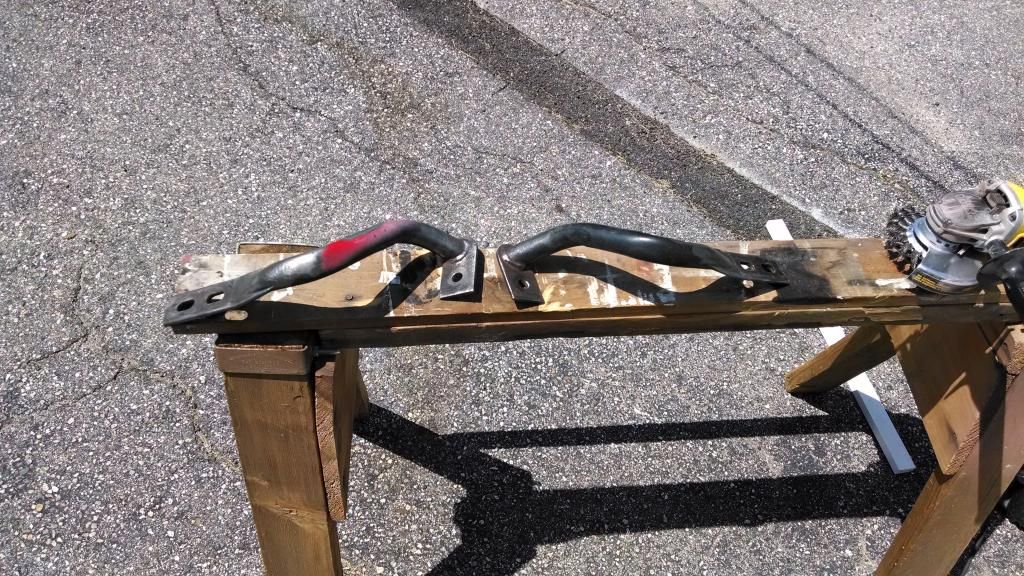
Cut inner brackets and deburred.
Soap n water, degreased, Metal primer, Brushed on that Safety Red. :thumbsup:
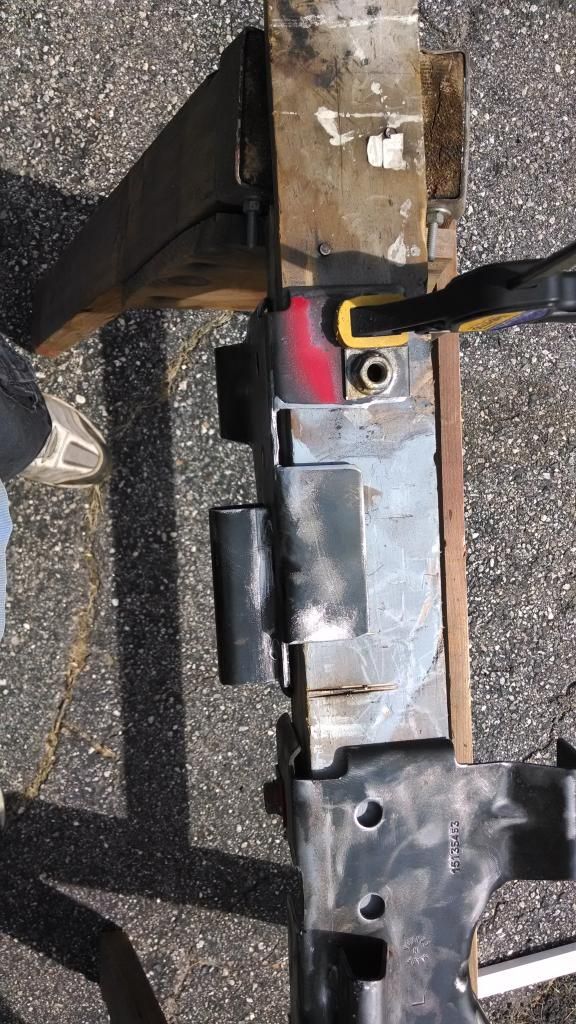
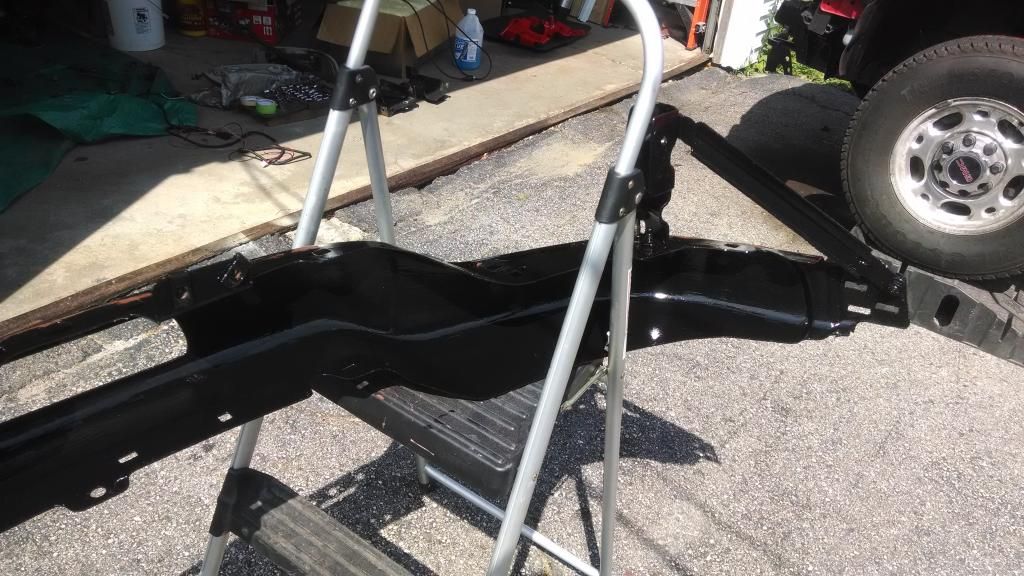
Frame is pretty good on truck but I ground down some of the edges on the front of the frame. I really wanted to test out this new rusty metal primer and it's adhesion to metal, surface rust and that sticky GM undercoating.
Yes it goes on brown in color. I plan on doing a gloss black over it.
Notes:
I am really liking these Rustoleum product(s). It goes on with a brush or roller about as thick as a house paint.
You can thin it with straight acetone and spray it if you want to, but it is messy. WEAR GLOVES.. I got this on my hands, and it's just nasty to get off. Its very sticky and sticks to everything. Once you mop it on, it oozes and smooths out a lot. Buy a lot of cheap brushes. I went through 2 with the small areas I did. No point in cleaning them afterwards if they are el cheapo.
Also note that it takes a long time to dry. 4-6hrs just to handle it and a good 24hrs for another coat.
I'll probably end up top coating the front of the frame a bit earlier then that... maybe 16-18hrs. I want to get that bumper back on tomorrow night, so the top coat will be safe to work around by that time.
I plan on pulling the bed off later this summer and using the same products for entire back half of truck. I want to keep my frame in good shape, and this stuff should do a good job sealing it in. We'll see.
Note #2 I also have "Chassis Saver" that I am willing to give a go. Maybe on my springs, or something with a little more surface rust. That way I can compare it. Painting in stages is labor intensive for sure.
Removed brackets off the upper/lower bumper. Ground rust.
Cut inner brackets and deburred.
Soap n water, degreased, Metal primer, Brushed on that Safety Red. :thumbsup:
Frame is pretty good on truck but I ground down some of the edges on the front of the frame. I really wanted to test out this new rusty metal primer and it's adhesion to metal, surface rust and that sticky GM undercoating.
Yes it goes on brown in color. I plan on doing a gloss black over it.
Notes:
I am really liking these Rustoleum product(s). It goes on with a brush or roller about as thick as a house paint.
You can thin it with straight acetone and spray it if you want to, but it is messy. WEAR GLOVES.. I got this on my hands, and it's just nasty to get off. Its very sticky and sticks to everything. Once you mop it on, it oozes and smooths out a lot. Buy a lot of cheap brushes. I went through 2 with the small areas I did. No point in cleaning them afterwards if they are el cheapo.
Also note that it takes a long time to dry. 4-6hrs just to handle it and a good 24hrs for another coat.
I'll probably end up top coating the front of the frame a bit earlier then that... maybe 16-18hrs. I want to get that bumper back on tomorrow night, so the top coat will be safe to work around by that time.
I plan on pulling the bed off later this summer and using the same products for entire back half of truck. I want to keep my frame in good shape, and this stuff should do a good job sealing it in. We'll see.
Note #2 I also have "Chassis Saver" that I am willing to give a go. Maybe on my springs, or something with a little more surface rust. That way I can compare it. Painting in stages is labor intensive for sure.
Last edited:
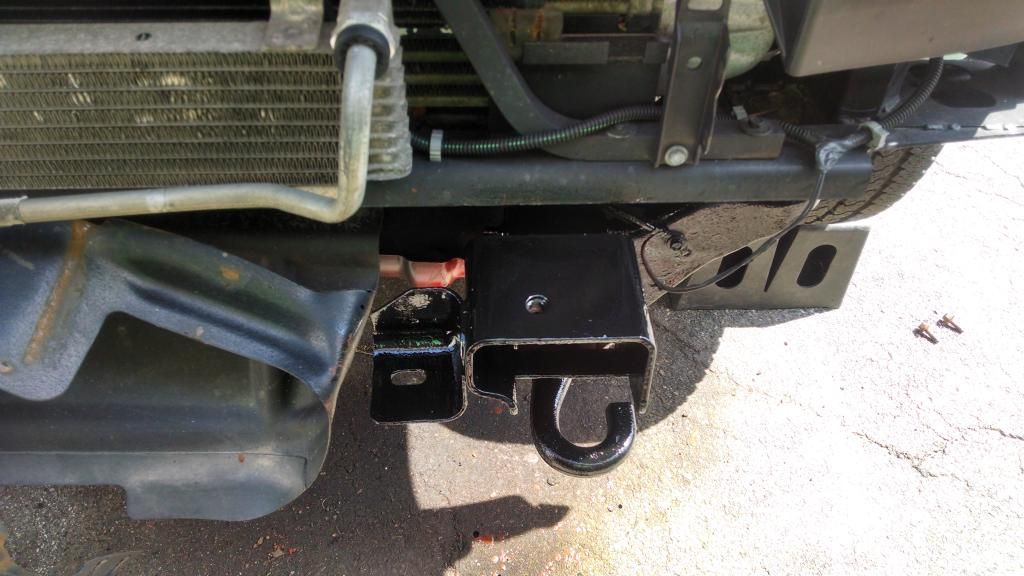
This bumper mod is taking forever. Dissembled the upper / lower bumper.
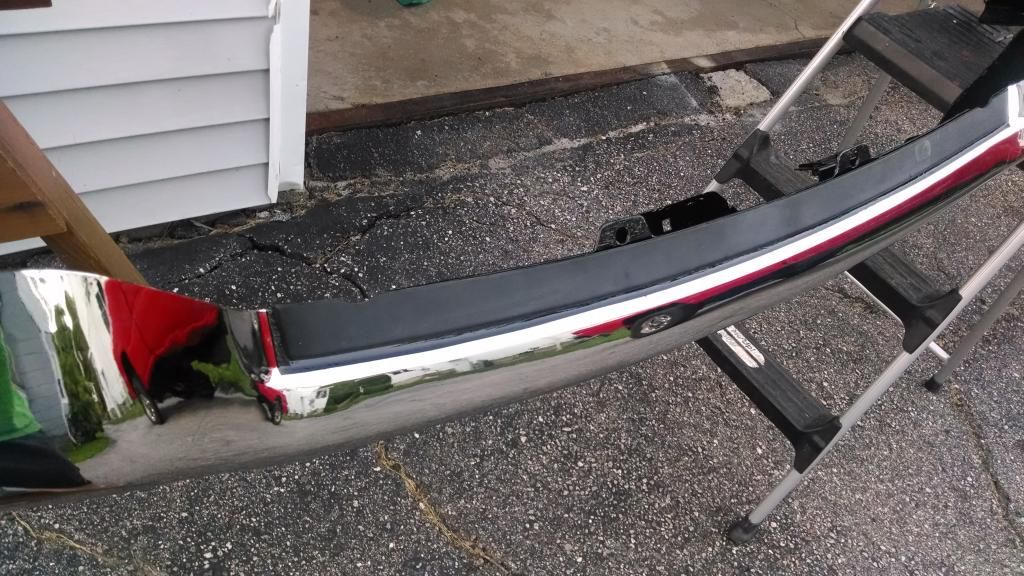
Taped off section to paint. I noticed just a slight hint of corrosion and decided to treat it.
Water probably sits under the bumper plastic cap.
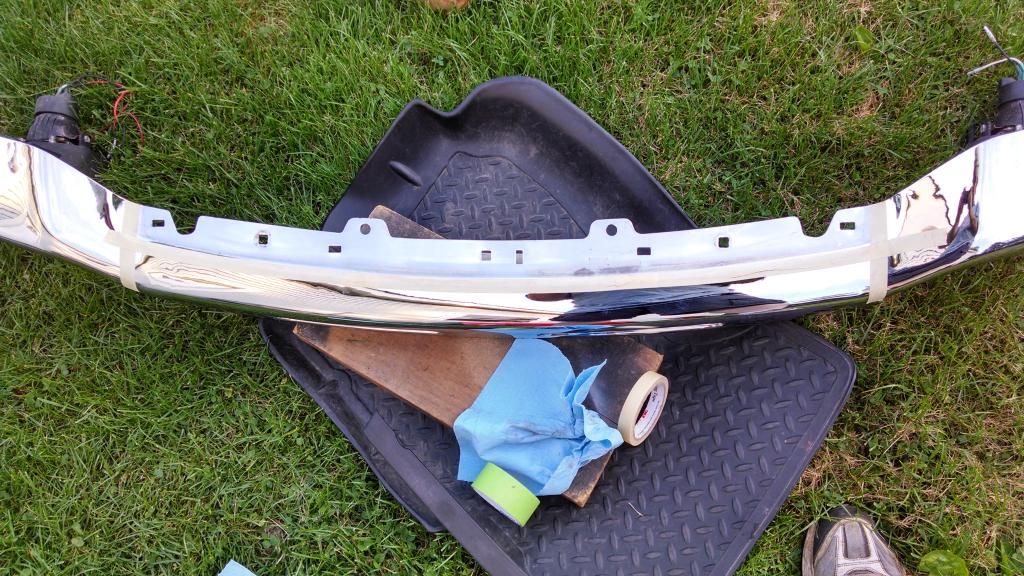
Had to grind all the rust and corrosion down.
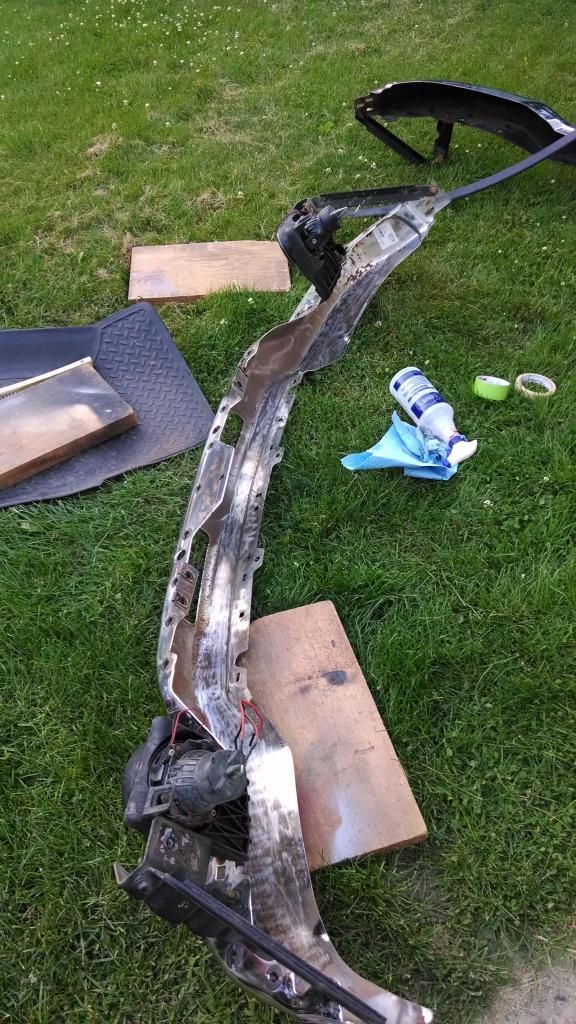
Just de-greased and sprayed with some acetone. Ready to seal the insides and outer lip.
Let it dry overnight. Will apply topcoat tomorrow with the other parts.
Long day working on little things..
Taped off section to paint. I noticed just a slight hint of corrosion and decided to treat it.
Water probably sits under the bumper plastic cap.
Had to grind all the rust and corrosion down.
Just de-greased and sprayed with some acetone. Ready to seal the insides and outer lip.
Let it dry overnight. Will apply topcoat tomorrow with the other parts.
Long day working on little things..
Last edited:
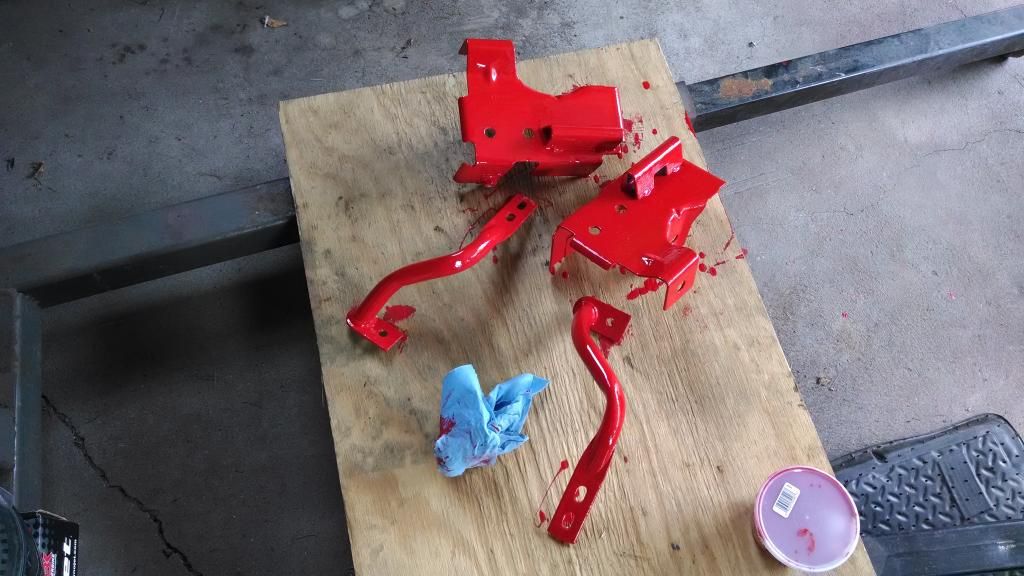
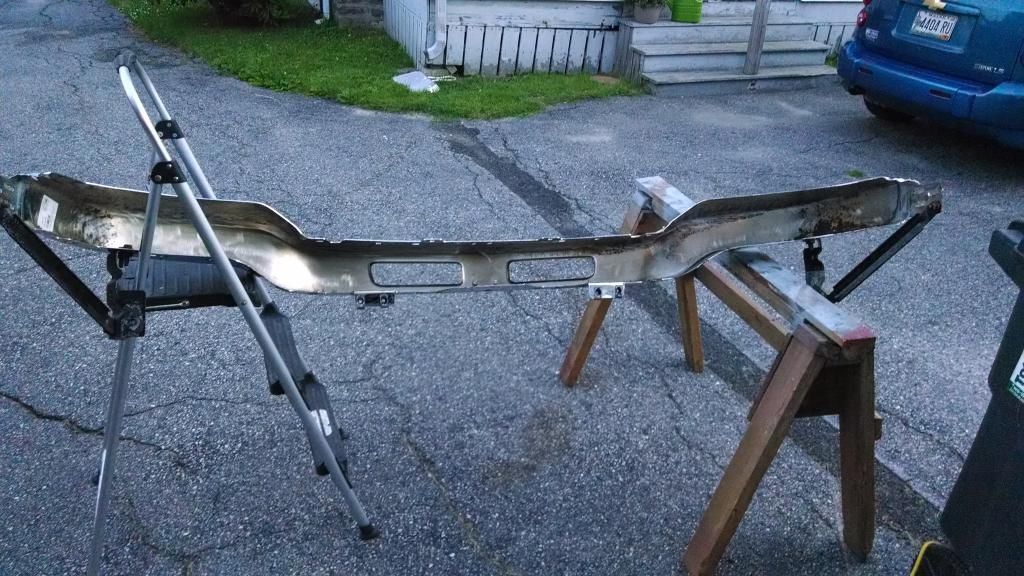
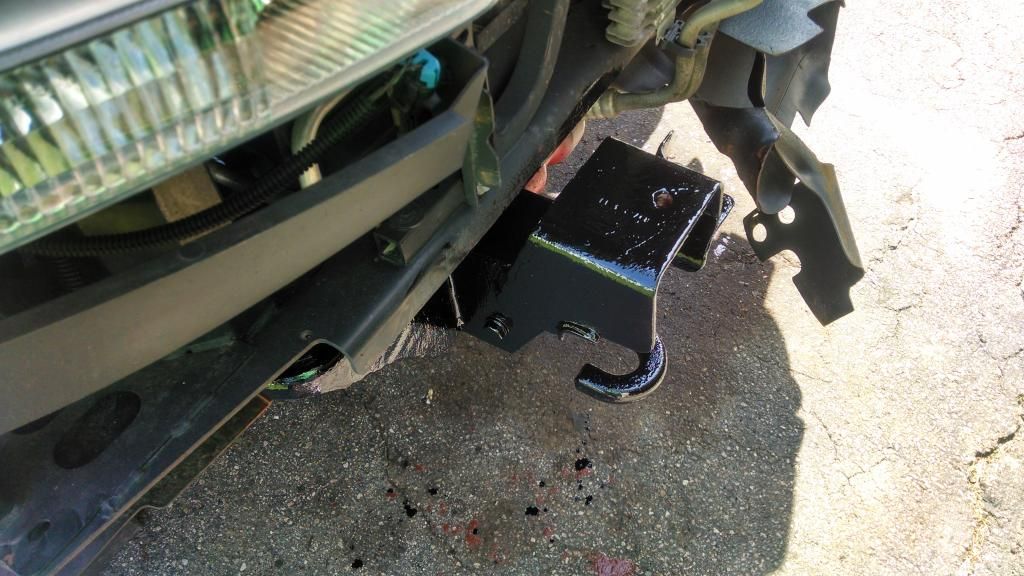
Top Coat in Gloss Black.
Stuff goes on thick and slowly smooths out as it settles.
4-5 more hours and I will be able to handle them, move them around.
Stuff goes on thick and slowly smooths out as it settles.
4-5 more hours and I will be able to handle them, move them around.
Color match bumper brackets, nice! Looks like a cencal build lol
Safety Red is slightly brighter but very close to Victory Red. Looks great - perfect for brackets & misc parts underneath. This stuff is gooey and thick. Makes a nice seal around the part. I figured "why not" instead of doing everything in gloss black.
It's still well protected though.
Not quite Cencal lol.
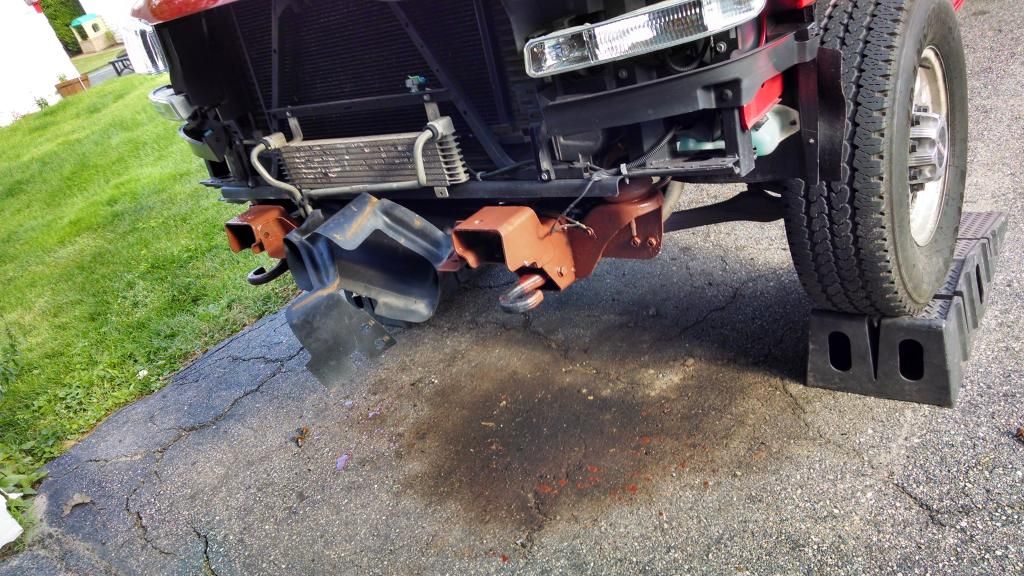
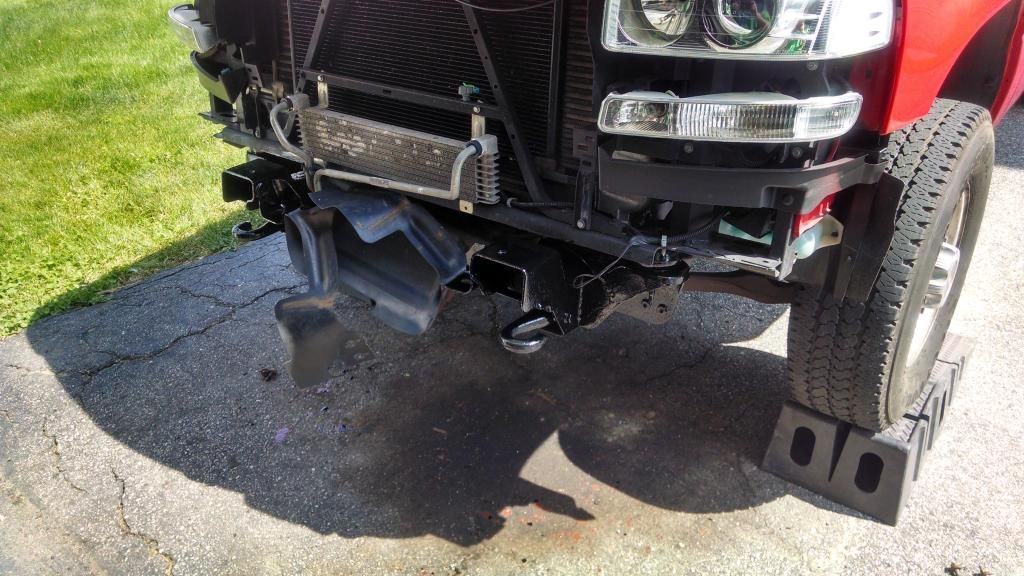
I have to wait another day for the paint to finish curing. Put the bumper cap on to see how it looks.
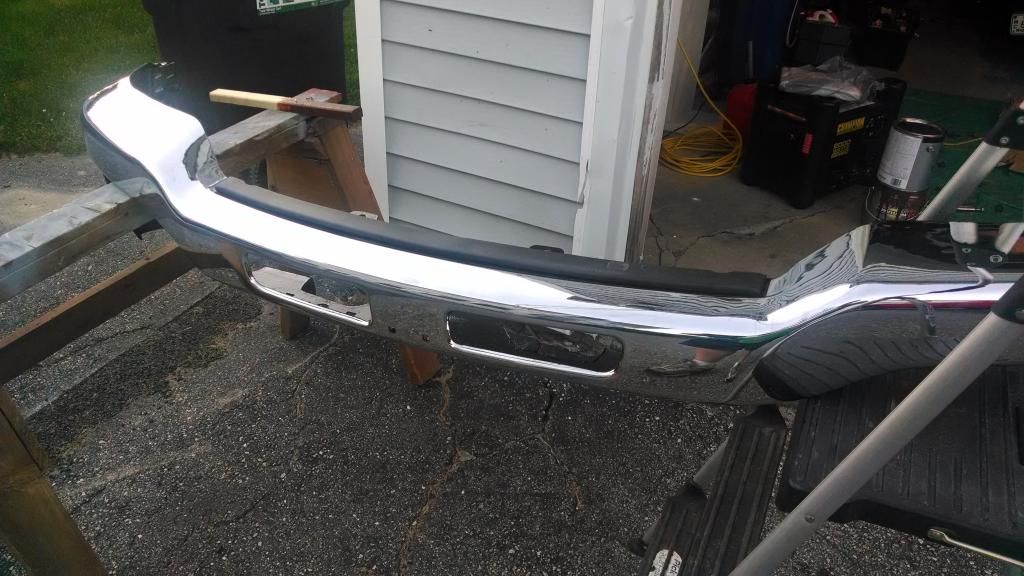
You can barely notice the coating unless you are looking for it. Hopefully it prevents that nasty corrosion.
I'll clean up the lines and edges but not much to do, and all of the edges sit behind the grill and lower bumper.
So tomorrow night I will reassemble the bumper finally, and see if i can complete the bumper mod which was the original goal here.
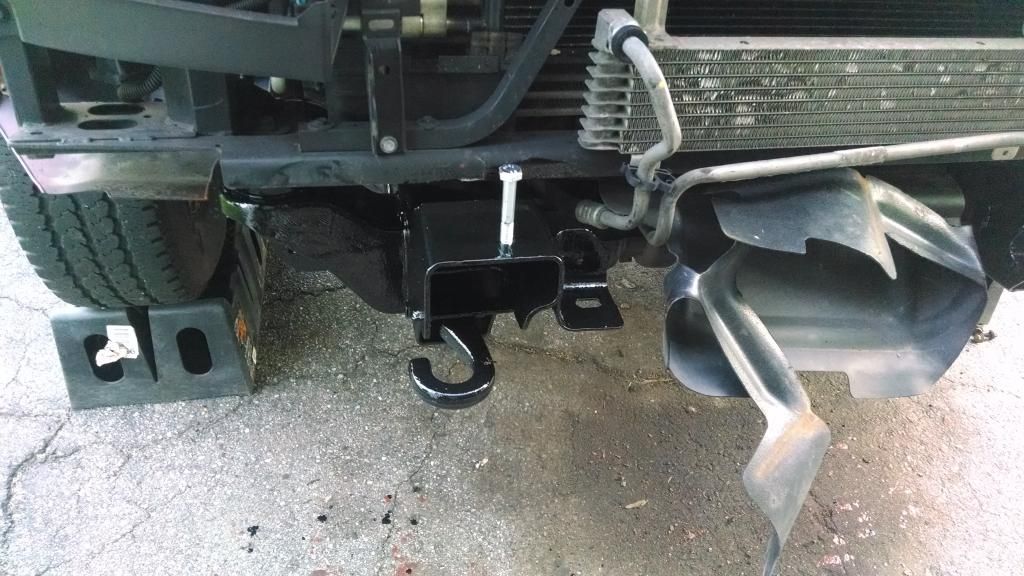
Got my new stainless bolts (12x1.75 @ 80mm) [EDIT : Changed to 90mm], washers and spacers ready to go.
Last edited: