ITGuy's 2003 Sierra 1500/2500 4x4 RCLB Build Thread

yep, I can thin it and shoot it.. but aside from paint dripping on me, i don't have to tape anything off this way.

have you tried shooting it? It probably cures a lot faster too when it's split with thinner.
 
Thanks. I'll take some pics soon. My patience was wearing thin.. I have the bed suspended by a hoist, so had to stay scrunched down and paint above my head. Way better than using the angle grinder though..that got old real quick. Just glad its at a stage where I can leave it.

Been there before on much bigger projects. I reapinted a 16' flatbed a few summers ago, was solid rust when I started. And I redid a 28' tiltdeck trailer this summer, same deal all rusty and layers upon layers of old paint and runs to remove before shooting it. I hate sitting on the ground or bending over running a grinder/wire wheel.

yep, I can thin it and shoot it.. but aside from paint dripping on me, i don't have to tape anything off this way.

have you tried shooting it? It probably cures a lot faster too when it's split with thinner.

I actually shot the above truck bed with rustoleum products. We brushed the rusty metal primer on for the first coat to make sure we covered all the inside edges, let it cure and then thinned and sprayed another coat on to even it out. Then sprayed with rustoleum gloss black top coat. It came out great but was soft for probably a few weeks. The issue I've noticed with rustoleum is sometimes the top coat wont stick well to the primer in places, and the gloss black gets dull/oxidized after a year or so outside. But when you spray it you can mess with it after faster than brushed, but it also takes more coats to cover when spraying.
 
Man, as always thanks for the feedback! This forum is great for exactly that.

Yeah painting with brush is a PITA, but it slathers on thick and then settles while it cures. Comes out with a nice smooth surface.
I also noticed the same deal with it hardening up over time. The gloss black I put on the front end took a few days to become noticeably more resistant to dings and dents. I've since painted over the visible portions with the flat black and will continue to use that on the rest of the vehicle.

I will be doing the fender wells, some edging and the LCA's tonight. Still waiting on parts to arrive.
 
what are you waiting on now?

Cog leveling keys
Cog Lift Block
Bilstein steering damper
Moog idler arm
Moog pitman arm
oem Brake Shields
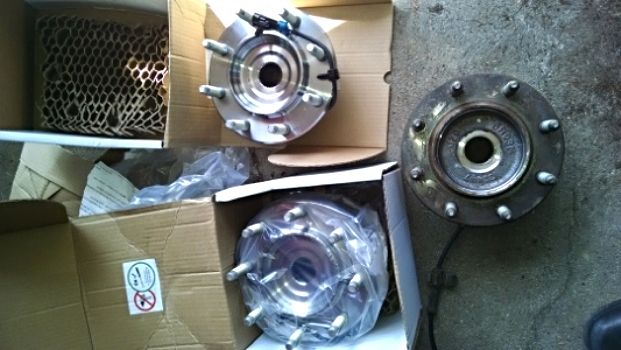
Callahan Hub Assemblies
Cog Transmission Bracket
Cog UCA's
and I am sure some other junk lol
I have some replacement hardware / bolts for other things coming too. Hoping I sized them right.
 
Last edited:
Yeah my lift came with the braces!! :up: Man I am so looking forward to slapping this all back together!

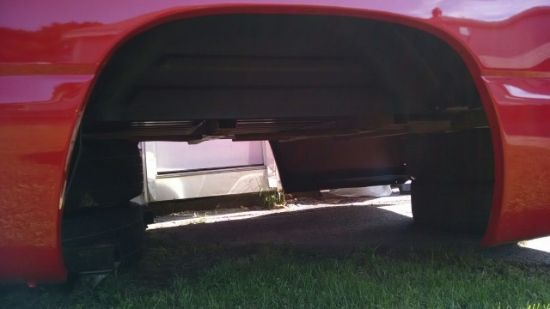
Finished painting the edges and fender wells of bed with flat black. The fender wells will have the new liners, but still wanted it to look good under there. It also has a better chance of standing up to any corrosion after I install my flares.

Tomorrow I will paint the LCA's and maybe do some more under the bed if I feel like it, but not necessary at this point. The 'copper' look is fine with me as long as it provides protection, but an extra coat of flat black isn't hurting anything.

Oh and my UCA's are coming tomorrow (Wednesday). I'll have those installed as well.
 
Last edited:
Yeah I removed them to paint the mounts. I didn't paint where the bushings would go though, I'll just clean the surface before installing them.
Wheel hubs are coming in today too.

:mynga:

I still wish I lived in an area like SoCal or Florida.. I'm jealous of those minty-fresh undercarriages [You can tell I was browsing Cornell's thread..]
 
Fenders are dry. Ready for the wheel well liners and flares. Just need the rest of the truck :hahano:
output_zpskqjxwtsp.jpg


More parts are starting to roll in. Heavy Duty Hub Assemblies.
IMG_20140903_122812495_zpsx1v4irwr.jpg