Huck's new daily - Victory Red '05 CCSSB
- Thread starter Huck
- Start date
You are using an out of date browser. It may not display this or other websites correctly.
You should upgrade or use an alternative browser.
You should upgrade or use an alternative browser.
Also ordered the last few odds and ends off RockAuto for the engine reseal. Found out by chance that they sell Melling 7.4 chromoly pushrods much cheaper than anyone else, $74 for the set. So I ordered those as well. Then ordered up a Truck Norris cam, valvesprings and barbell from BTR
Got the windows tinted. 35% over factory on the rear doors, 20% over factory on rear window, 20% on the front 2 and a 5% brow. When I replace the windshield, I'll do 50% over the whole thing with a brow. Didn't wanna go any darker, I drive backroads 95% of the time and it's DARK out here
View attachment 3557
View attachment 3558
Have you seen these?

2003-2007 Chevrolet Silverado Cateye NBS QUAD MH1 8.0 / Micro D2S Retrofit C-Bracket
Retrofit your Cat Eye Chevrolet Silverado with a CRS, laser-cut C-Bracket. Fits 2003, 2004, 2005, 2006, and 2007 Chevrolet Silverado C-Brackets replicate the factory mounting points allowing for a no hassle installation. These Brackets convert the factory halogen reflectors found in the Cat Eye...
I have, I saved the link a long time ago lol. I debated that but I just don't like the way quad projectors look. I debated doing some kinda LED cube with a smoked lens in the high beam but I'll probably just leave it alone with the halogen that's in there for a clean look.Have you seen these?

2003-2007 Chevrolet Silverado Cateye NBS QUAD MH1 8.0 / Micro D2S Retrofit C-Bracket
Retrofit your Cat Eye Chevrolet Silverado with a CRS, laser-cut C-Bracket. Fits 2003, 2004, 2005, 2006, and 2007 Chevrolet Silverado C-Brackets replicate the factory mounting points allowing for a no hassle installation. These Brackets convert the factory halogen reflectors found in the Cat Eye...custom-brackets-designs.myshopify.com
Went ahead and ordered the last few gaskets for the engine reseal and a BTR Truck Norris cam/springs. Didn't plan on such a choppy cam but everywhere I looked that cam had the best, broadest power band with the most torque down below 3k compared to anything else. Richard Holdener's videos finally talked me into it cuz he said it would be his choice, even over the BTR Torque Cam. I also think I'm going to throw my Circle D 2800-3000 stall from the C10 in it just cuz it's sitting on the shelf collecting dust and any of these trucks can benefit from a little stall. If I were buying one, I'd probably go with a TrailBlazer converter just cuz it's a little tighter but I've got this one on the shelf so it's not costing me anything.
Also got all my stuff from QP in and started the re-gear on Monday.
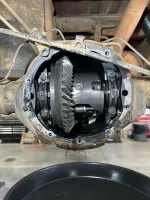
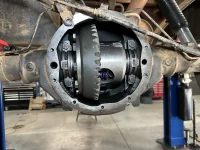
Everything looked great inside, nice and clean. Even the races look close to new, certainly awesome for 186k miles
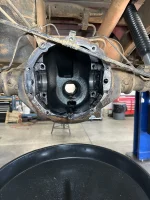
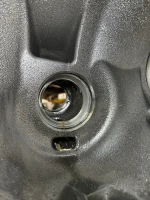
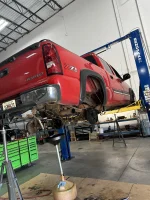
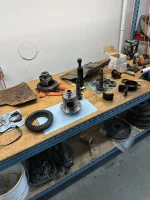
Also got all my stuff from QP in and started the re-gear on Monday.

Everything looked great inside, nice and clean. Even the races look close to new, certainly awesome for 186k miles


Picked up some new tools to help with the install as well - A race/seal driver set
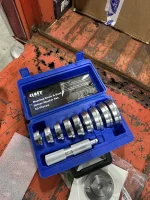
And a bearing puller. I'd never seen this before but a guy on the C10 forums recommended this. This was a godsend for getting the pinion bearing off the OE pinion so I could use that shim to start with
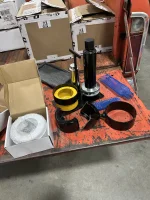
And then for the front diff, I needed this spanner to adjust the side bearings/preloaders
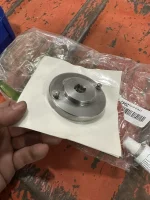

And a bearing puller. I'd never seen this before but a guy on the C10 forums recommended this. This was a godsend for getting the pinion bearing off the OE pinion so I could use that shim to start with

And then for the front diff, I needed this spanner to adjust the side bearings/preloaders

So this past Monday is when I disassembled everything, I left off with an empty housing and everything cleaned. We lost power around 4:15 Tuesday, so once my computer died, I decided to go ahead and put the carrier side bearings on in the press and then drive in the pinion bearing races. Left around 6 to go to a friend's house for new year's
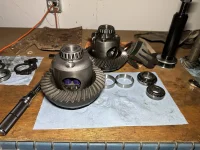
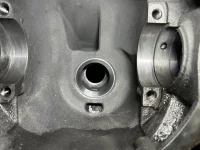
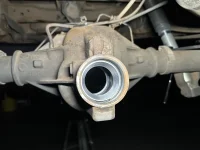
Then Wednesday I got back to the shop around 11am. Didn't get far before I needed to go to town for more supplies. I had planned to make setup bearings out of my old GM bearings but the Dremel was taking FOREVER. Tried to find some drum style flap discs but struck out at Harbor Freight, Lowe's and Home Depot. Ended up finding these 3/4" diameter stones at HD and they worked perfect
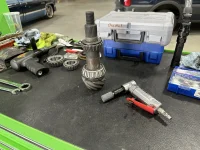
Got everything put in and went to tighten down the bearing caps and everything locked down solid. Didn't matter what shim combo I did, locked down solid as soon as I start to tighten down the caps. Hmm...


Then Wednesday I got back to the shop around 11am. Didn't get far before I needed to go to town for more supplies. I had planned to make setup bearings out of my old GM bearings but the Dremel was taking FOREVER. Tried to find some drum style flap discs but struck out at Harbor Freight, Lowe's and Home Depot. Ended up finding these 3/4" diameter stones at HD and they worked perfect

Got everything put in and went to tighten down the bearing caps and everything locked down solid. Didn't matter what shim combo I did, locked down solid as soon as I start to tighten down the caps. Hmm...

After several attempts and lots of head scratching, I finally figured out the pinion was WAYYYYY too deep. Oops
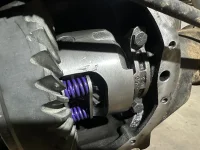
I had even looked at the pinion earlier going "I feel like the bearings shouldn't be that far out of the race". But I'd never done this before so I went with it
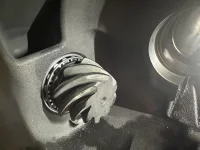
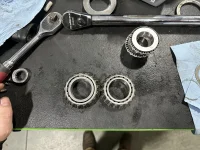
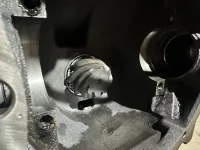
It's a little hard to see but the original large GM bearing (left) is 3mm (
 ) larger diameter and 1mm taller. The small bearings were also different, 1mm larger diameter and 1/2mm taller. That's HUGE when you're doing something with adjustments normally in the thousandths
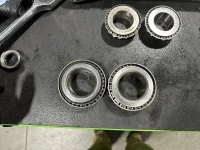
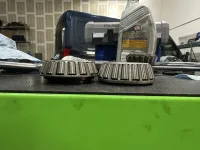

I had even looked at the pinion earlier going "I feel like the bearings shouldn't be that far out of the race". But I'd never done this before so I went with it

It's a little hard to see but the original large GM bearing (left) is 3mm (


So now I had to sacrifice my new Koyo bearings that came in the kit
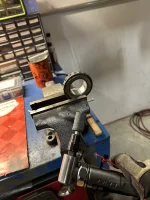
Also, just to triple verify, I threw in the carrier with no pinion to see how it spun. It's mid free-spin here. Perfect
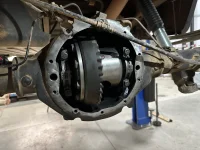
That's muchhhhh better, that's how a bearing should sit in it's race. Moving on...
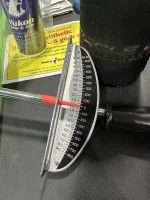
So then I was ready to check rotational torque/drag on the pinion. I'd ordered this split beam torque wrench through Napa. They handed it to me in a bag, I just grabbed it with my oil soaked gloves, threw the socket on and started to turn before I went "WTF". Never seen one of these go in 50in-lb increments up to 800in-lbs. Certainly less than ideal, but I did my best to eye-ball it to around 20-ish in-lbs. Spec is 14-19 so I may be a tick tight.
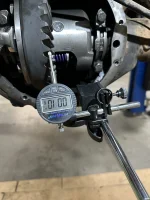
But I decided to push forward just to get a baseline. Backlash should be .006-.010. I'm at .0105, BARELY out of spec. Good start. This is with the factory shim on the pinion

Also, just to triple verify, I threw in the carrier with no pinion to see how it spun. It's mid free-spin here. Perfect

That's muchhhhh better, that's how a bearing should sit in it's race. Moving on...

So then I was ready to check rotational torque/drag on the pinion. I'd ordered this split beam torque wrench through Napa. They handed it to me in a bag, I just grabbed it with my oil soaked gloves, threw the socket on and started to turn before I went "WTF". Never seen one of these go in 50in-lb increments up to 800in-lbs. Certainly less than ideal, but I did my best to eye-ball it to around 20-ish in-lbs. Spec is 14-19 so I may be a tick tight.

But I decided to push forward just to get a baseline. Backlash should be .006-.010. I'm at .0105, BARELY out of spec. Good start. This is with the factory shim on the pinion

Last edited:
Time to paint and see what happens
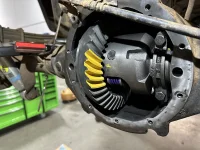
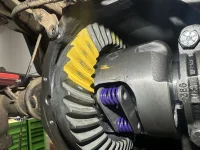
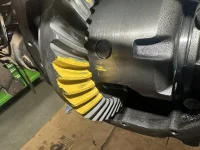
Not bad on the drive side but can't really see the coast side. I learned right after this that it's best to mix the gear marking compound with some gear oil so it's thinner and less sticky. So let's try again...
Much better. I'm still learning and bumbling through this, so here's my read on it (I'm also getting input from several others that have done this before). The pinion is a little too deep toward the carrier, so I think I need to take away .005 or so from the pinion shim. The backlash is out of spec and pulling the pinion away will make that worse, so I also need to shift the carrier toward the passenger side about .007-.010 and go from there.
But considering the huge change in ratios, it's amazing I'm in the ballpark this good with factory shims. This was factory shim under the pinion bearing and also nothing but factory shims on either side of the carrier.
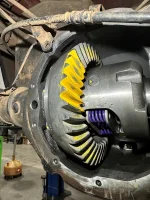
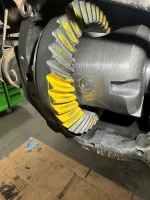


So I called QP back today and ordered another set of pinion bearings and made sure they were gonna be Koyo's and not Timkens, that way the variation should be minimal. Gonna go ahead and play some more with the shims this afternoon and tomorrow afternoon to see where I end up at.
Lol there's gonna be tons of activity over the next month. Planning on finishing up the rear end this weekend, yanking the front diff to do it and replacing all the front end components I've got. Then I'll immediately yank the motor too. Wanna have all of it finished up by mid-Feb so I can get back on the blue truck


