
So I needed a spot to mount some switches on my dash and figured the cubby hole on the drivers side would be a good spot.

Ordered a sheet of black ABS plastic for $6
ABS Plastic Sheet - .125" Thick, Black, 12" x 12" - Pick: Color, Thickness, Size: Amazon.com: Industrial & Scientific
Once that came in I took out the cubby. All you gotta do is remove your dash bezel..(Shift into 1st, tilt steering wheel down and start pulling the bezel off)
Get a screwdriver and release the top tab holding the cubby in place and pull from there, itll slide out.
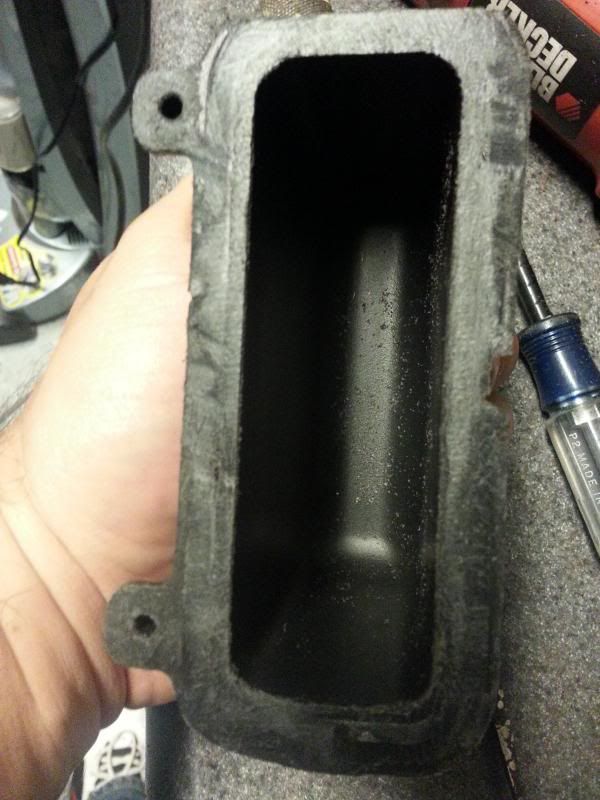
The cubby has a raised lip all around....we need to grind/file that down so make room for the abs panel.

So bust out ur dremel or grinders and get rid of it. I used a grinder and a flapper wheel. Remove plastic till you start seeing the outline around the edge of the cubby.
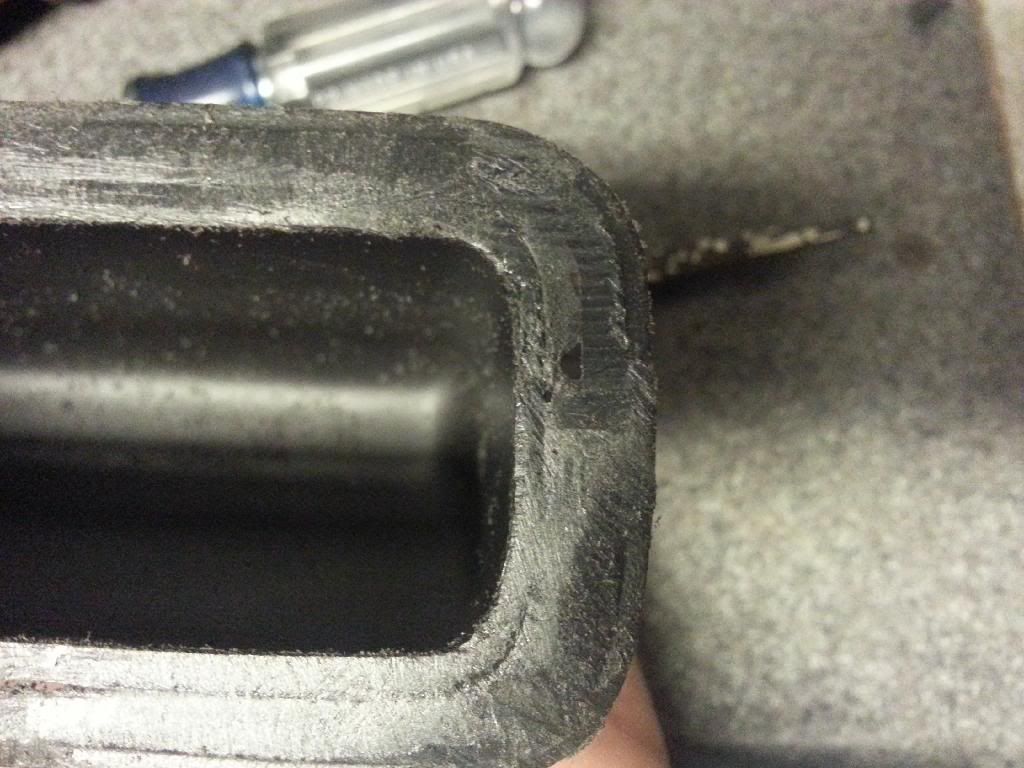
If you take too much off, you go right through the lip like seen below
Once thats done, take the cubby and lay it down flat on the sheet of abs....trace it and cut it out. I used a sharp blade and a heat gun...would heat up the panel and cut. I cut it bigger than the outline to give me room to file it down to my liking.

Use youre pref method of gluing...I used gel crazy glue...you can use plastic epoxy or whatev u want...u choose. I let it set overnight and this was the end result.
Now, if you want to run "snap in" switches...all u gotta do is drill the back of the cubby and the faceplate and drop it in. If youre gonna run switches like mine that have a nut to keep them in place, you have to hack off the back side of the cubby. No big deal, just keep that in mind when you choose the switches you wann run.
i didnt pre-drill the holes because I want to trace the bezel and find my center line once its installed. Center line uninstalled is different than installed. So the plan is to remove the cubby, put blue painters tape on the faceplate, install the cubby and bezel, trace it, remove the cubby and find my center line and drill for my switches.
Ordered a sheet of black ABS plastic for $6
ABS Plastic Sheet - .125" Thick, Black, 12" x 12" - Pick: Color, Thickness, Size: Amazon.com: Industrial & Scientific
Once that came in I took out the cubby. All you gotta do is remove your dash bezel..(Shift into 1st, tilt steering wheel down and start pulling the bezel off)
Get a screwdriver and release the top tab holding the cubby in place and pull from there, itll slide out.
The cubby has a raised lip all around....we need to grind/file that down so make room for the abs panel.
So bust out ur dremel or grinders and get rid of it. I used a grinder and a flapper wheel. Remove plastic till you start seeing the outline around the edge of the cubby.
If you take too much off, you go right through the lip like seen below
Once thats done, take the cubby and lay it down flat on the sheet of abs....trace it and cut it out. I used a sharp blade and a heat gun...would heat up the panel and cut. I cut it bigger than the outline to give me room to file it down to my liking.
Use youre pref method of gluing...I used gel crazy glue...you can use plastic epoxy or whatev u want...u choose. I let it set overnight and this was the end result.
Now, if you want to run "snap in" switches...all u gotta do is drill the back of the cubby and the faceplate and drop it in. If youre gonna run switches like mine that have a nut to keep them in place, you have to hack off the back side of the cubby. No big deal, just keep that in mind when you choose the switches you wann run.
i didnt pre-drill the holes because I want to trace the bezel and find my center line once its installed. Center line uninstalled is different than installed. So the plan is to remove the cubby, put blue painters tape on the faceplate, install the cubby and bezel, trace it, remove the cubby and find my center line and drill for my switches.
Last edited:
 kay:
kay: