
The other day I was doing a wheel/tire swap on the Sierra when I noticed while it was on jackstands there was a lot of lateral play when I would lift or pull on then axle shafts. Enough play to cause an audible clunk when lifted and let go. Although my axle seals have never leaked fluid, I still found the play unacceptable so I decided to tear into it.
I went ahead and ordered:
- Motive Ten Factory axles #MGR-MG27129
- Timken outer bearings #TMK-513067
- Timken outer seals #TMK-4762N
And some Spicer 1330 u-joints and some other parts, but that's a different project...
Then I got caught off guard and did not realize until the axle shafts arrived that the individual Ten Factory axle shafts for this application do not include wheel studs. So, I had to run to a dealership and pick up 12 OE wheel studs. M14x1.5 and I believe approx. 58mm length and 15.88mm serration dia.
I also needed to borrow a big slide hammer with bearing fittings from a local parts store to remove the old bearings and seals. I had all the other needed tools.
And on top of that got 4 bottles (used just over 3) of Valvoline conventional 80w90 gear oil. I got the conventional for use with the Detroit Trutrac. And since I am using a TA Performance girdle cover I didn't need a replacement gasket, just some Gear oil type grey gasket maker.
On top of that, while it's all apart is the perfect time to do parking drum brakes (which are a nightmare of a horrible design...)
So here's a few pics I took while doing this. Didn't document the whole process, mostly just things I wanted to have a record of or remember. Forgot to take pics of some key things like the slide hammer, but oh well.
First you have to drain the fluid and pop off the diff cover. I did not take photos of this because it is straight forward and simple.
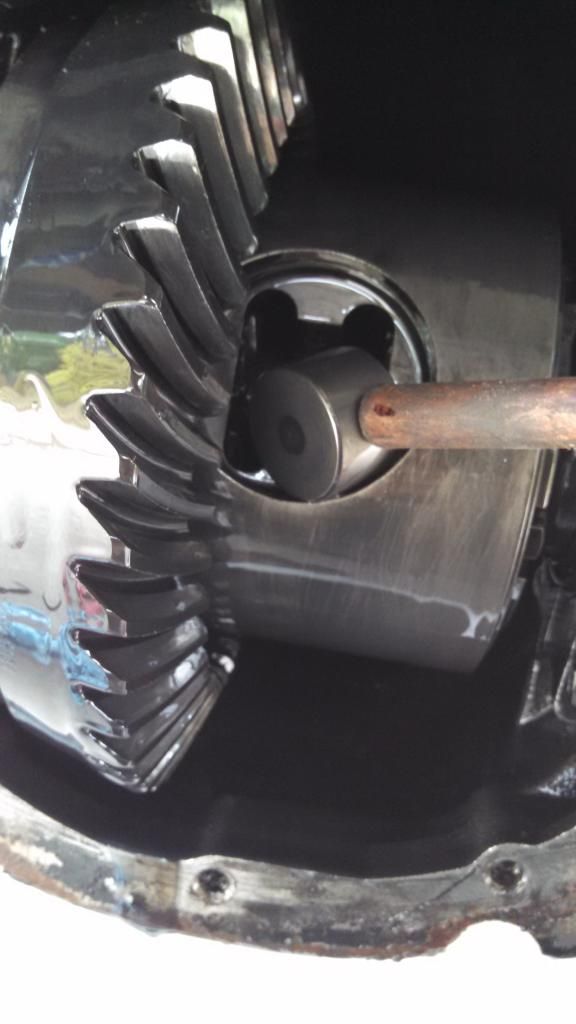
Then you'll have access to the carrier. This is a Detroit (Eaton) Trutrac, so it will look different than a factory g80...
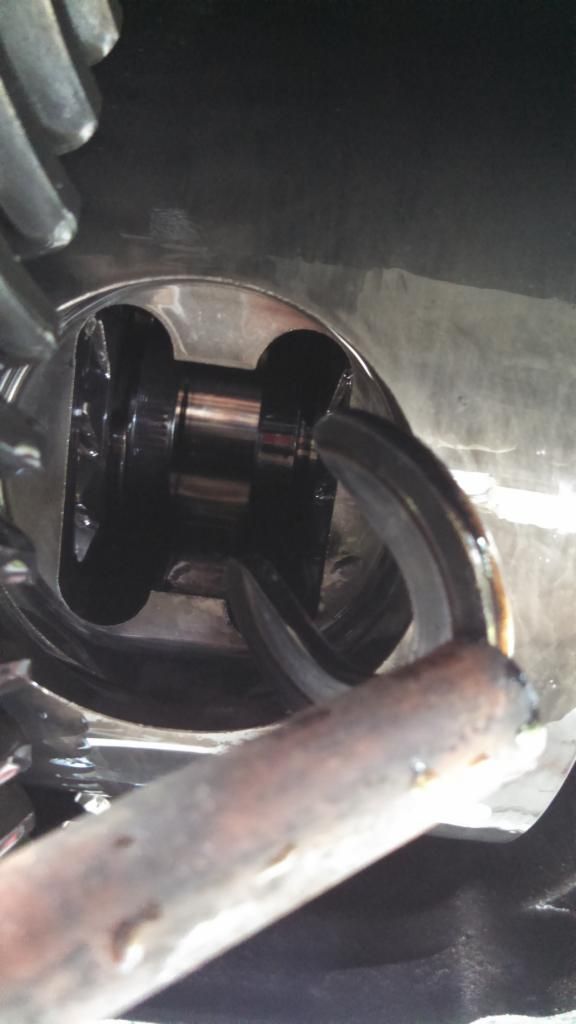
Already pulled the ID lockring circlip and the cap cover from the carrier. This is using a magnet stick to remove the spacer that holds the axles out on a Detroit Trutrac (will look different with a g80, etc)
With that removed you can push the axles inward (yes even with rear brake rotors still on!) far enough to access the C-Clips on each axle.
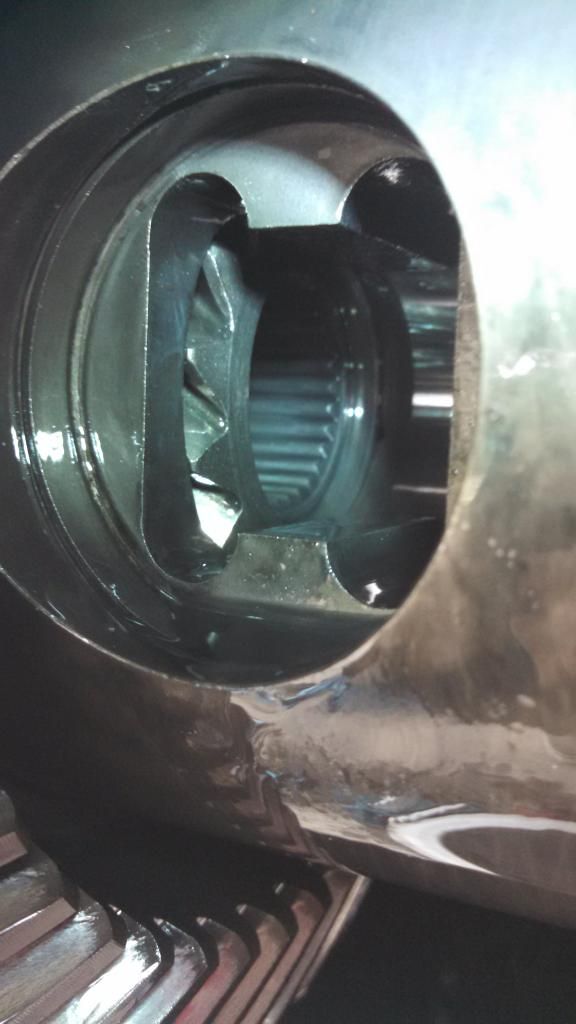
After you remove C-clips (and with disc brake calipers removed, the axle shafts are completely free onslide out)
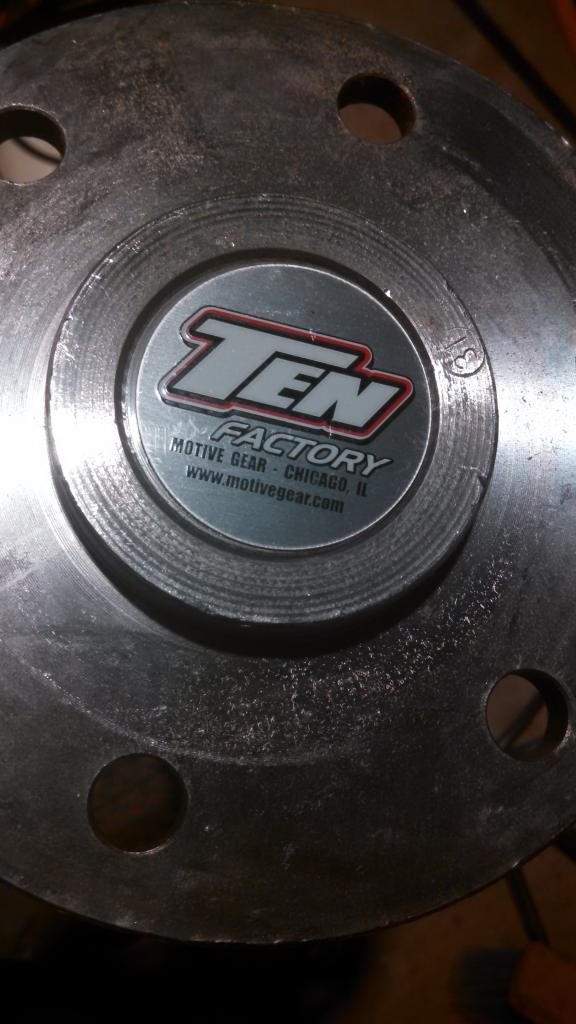
Empty carrier showing splines after axle is removed.
Quick video of that process after removing locking that holds cap in.
VID_20141030_145647_817_zpskcugfn4h.mp4 Video by bikesatori | Photobucket
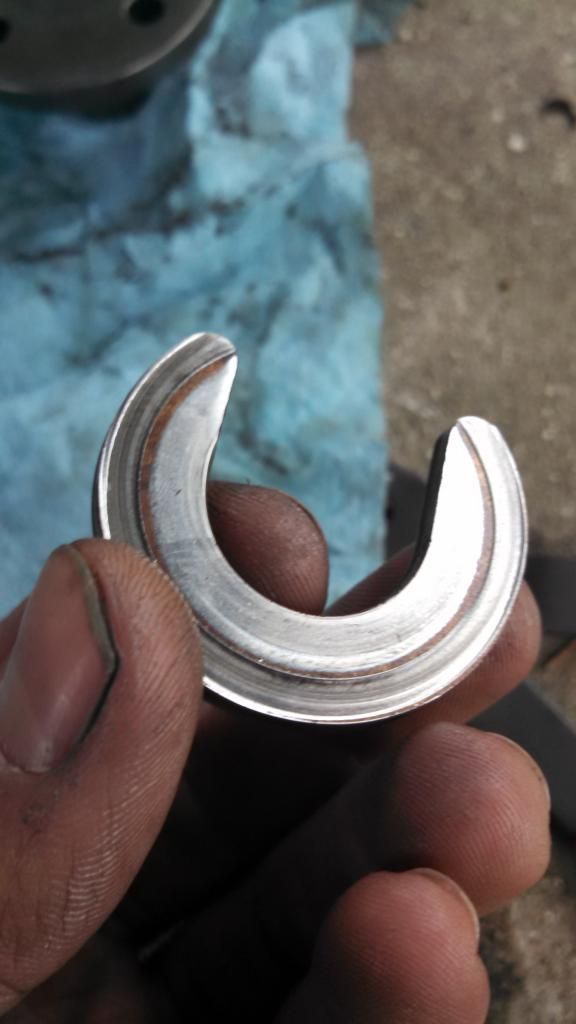
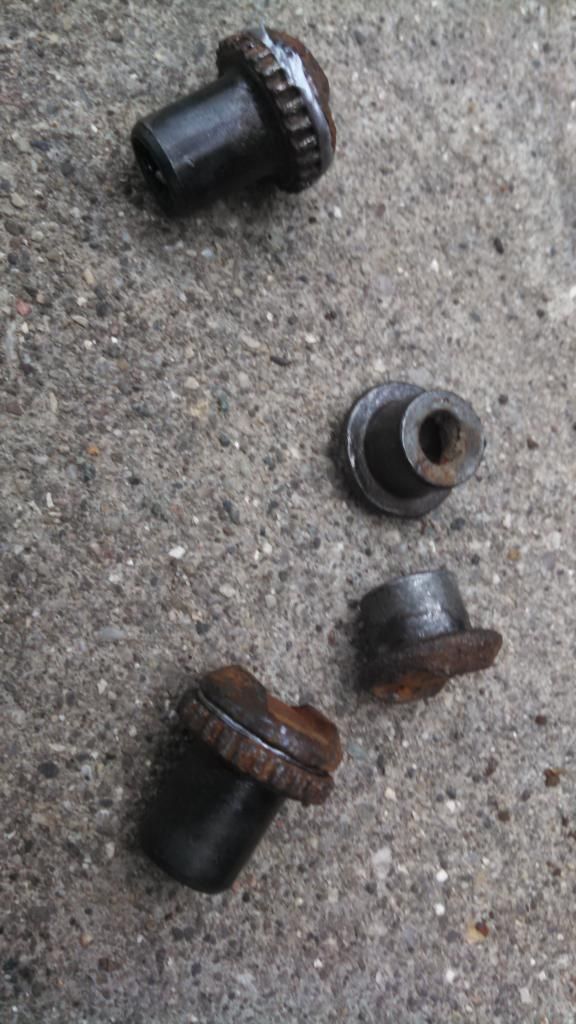
C-clips a little worn...
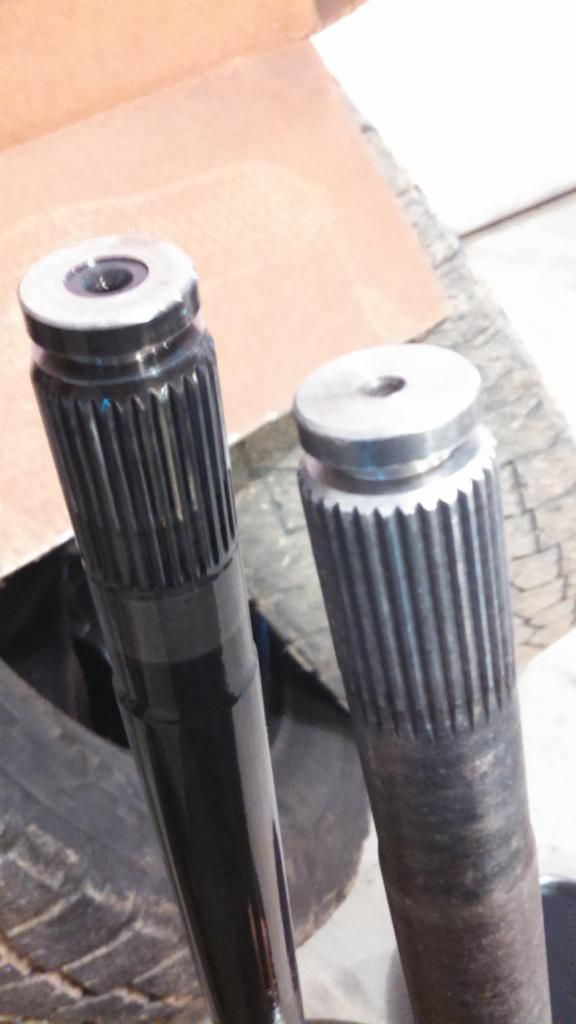
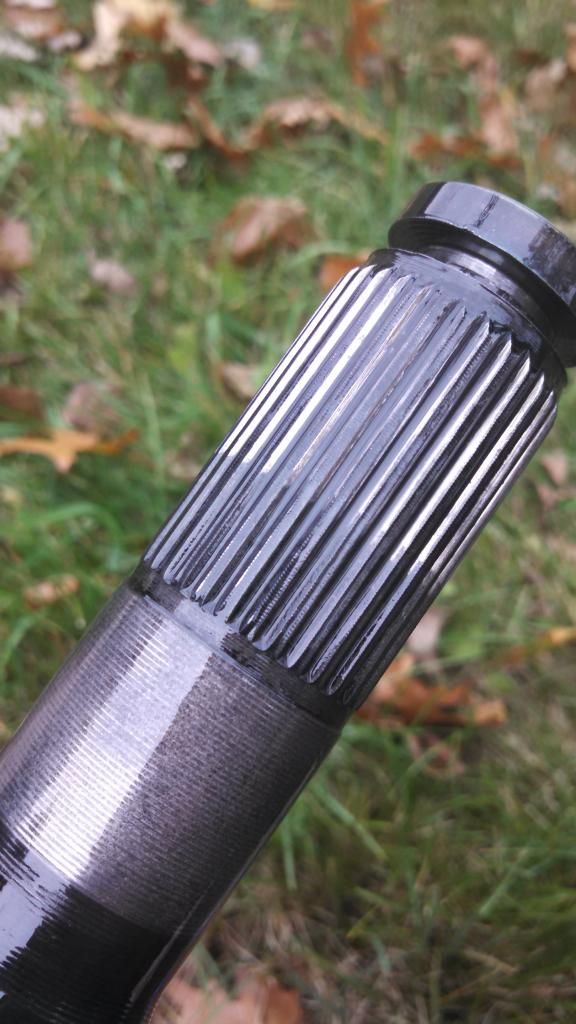
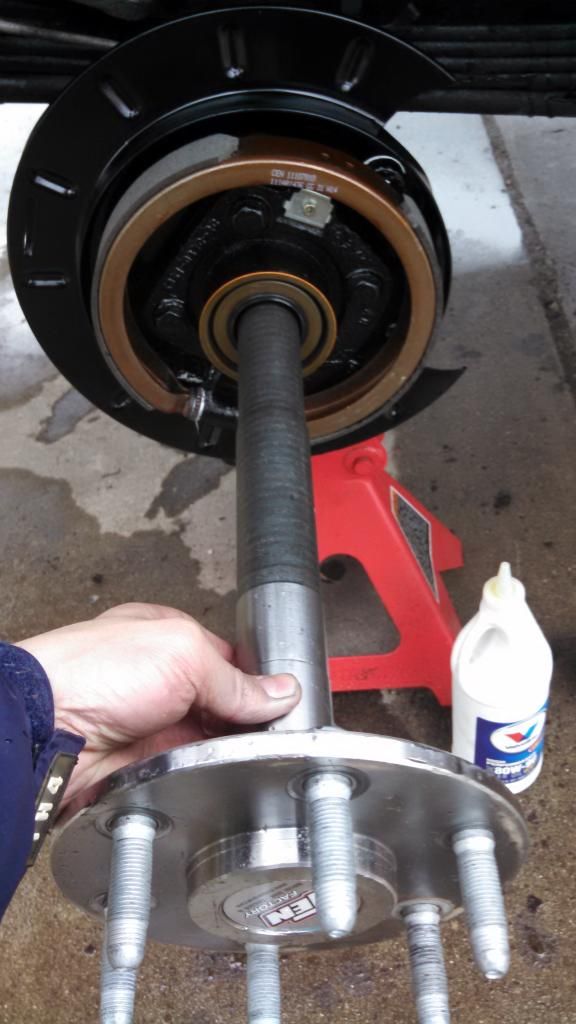
Motive Ten Factory axle shaft for 99-05 GM 1500 with 30 spline 8.5/8.6 10-bolt.
Slight differences in axle from GM OE piece.
Axleshafts did NOT come with wheel studs. Ended up purchasing 12 new GM OE studs from a dealership instead of getting dormans.

Installed studs by setting in place with a few straight whacks with a mini sledge, then seating flush with a spacer, a lug-nut, and a Milwaukee Fuel impact.
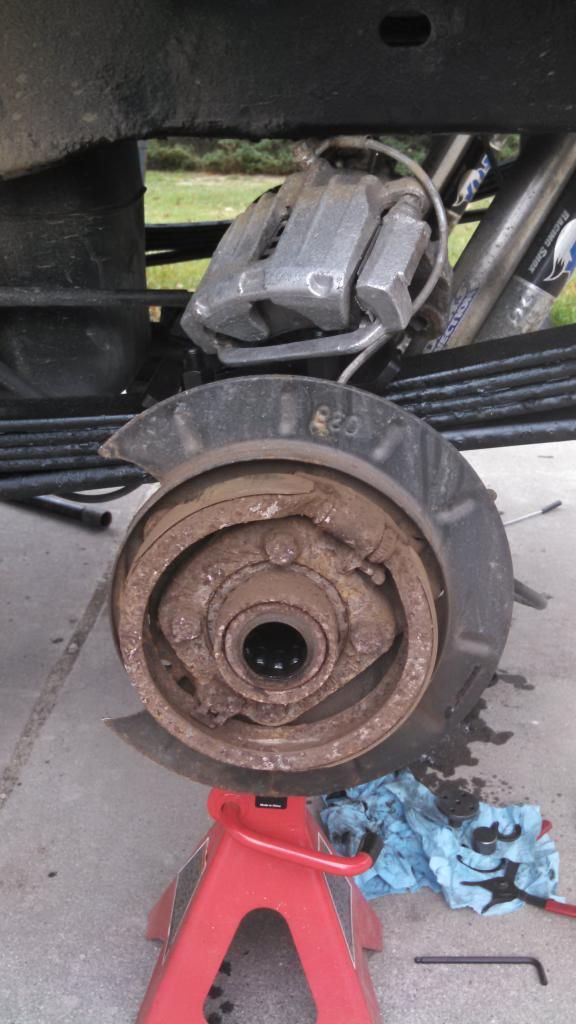
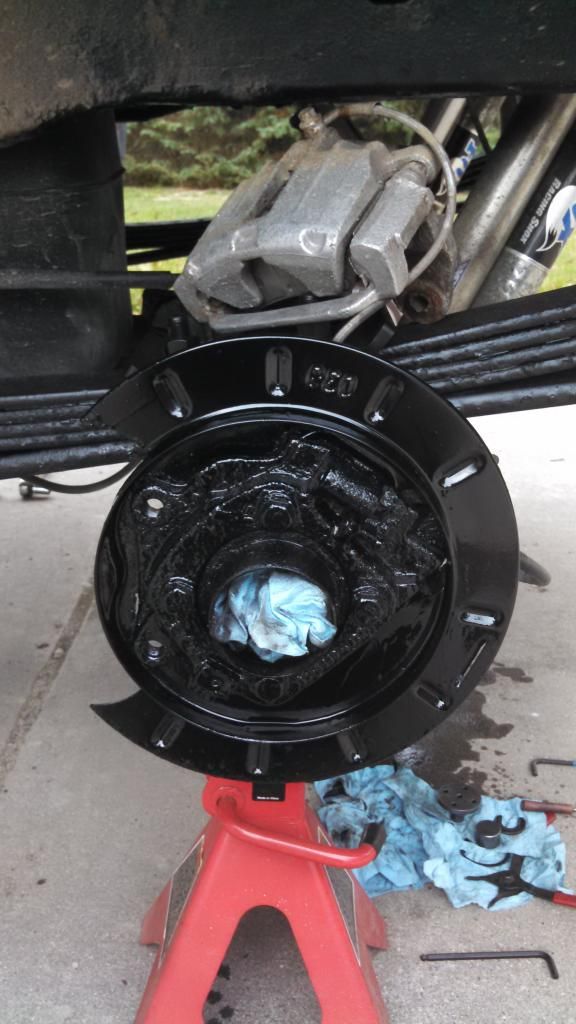
Here was the condition of my parking brakes. Beautiful.
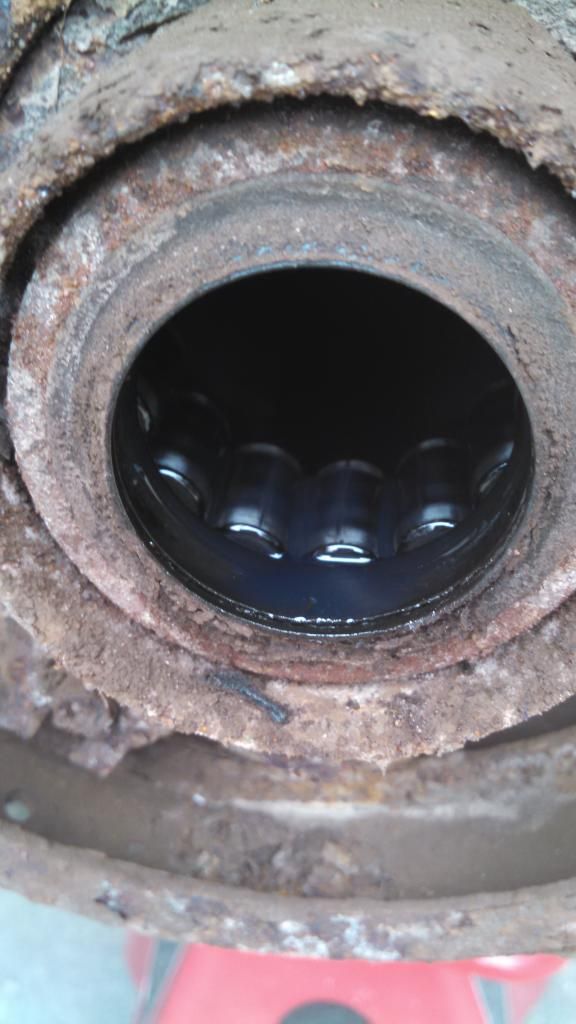
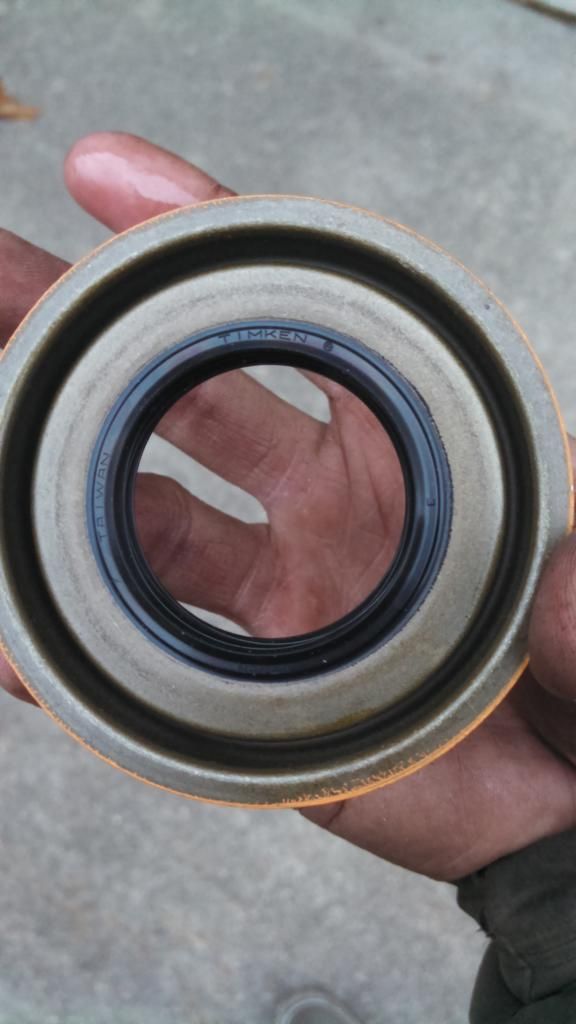
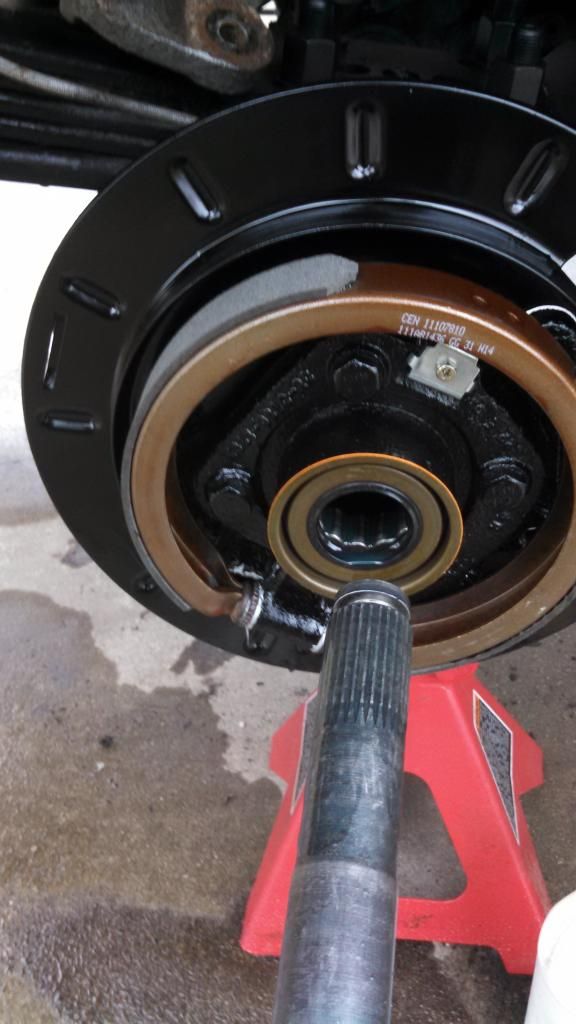
Outer axle seal and bearing.
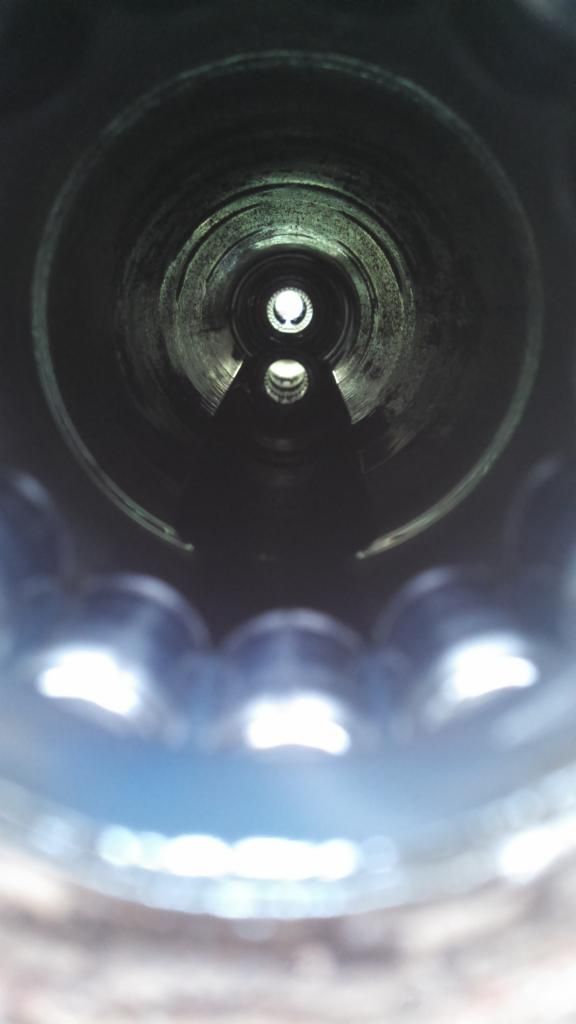
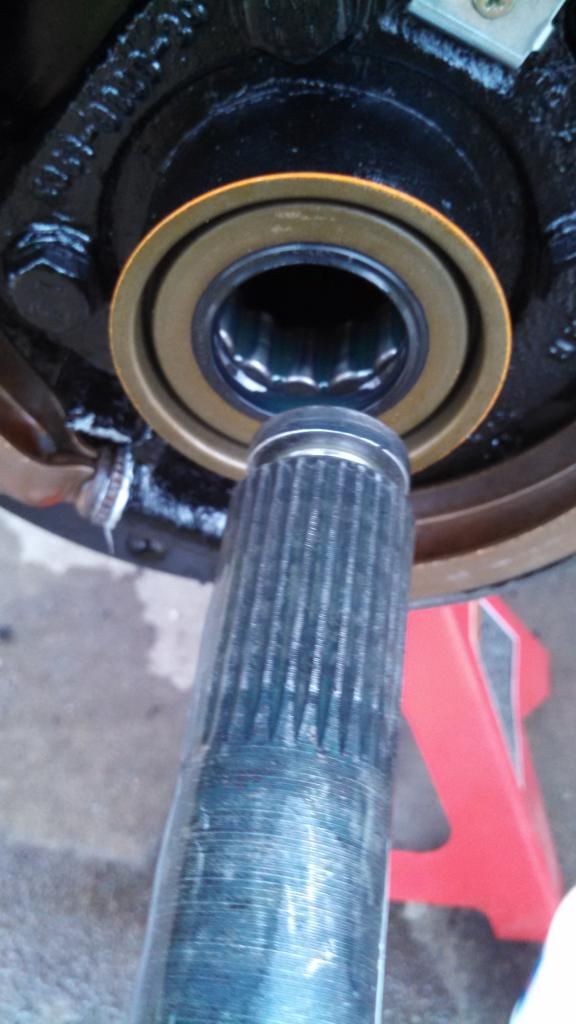
Through the tunnel.
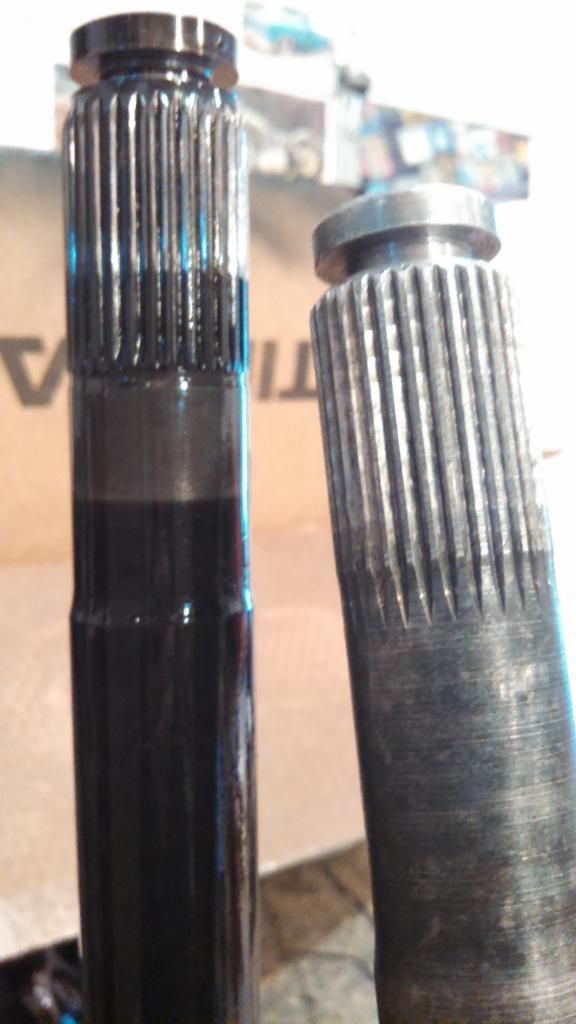
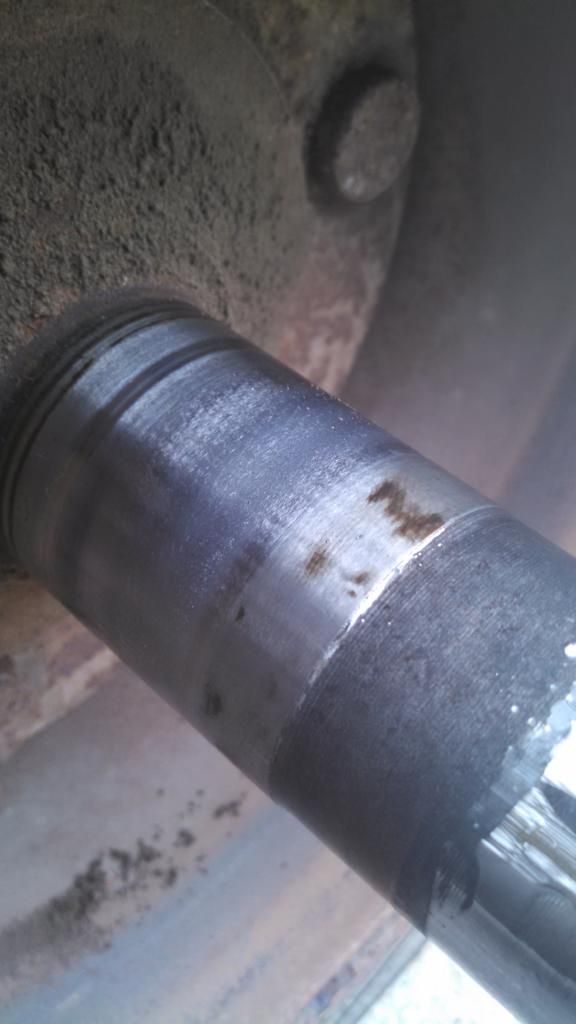
What initially provoked me to do this swap and upgrade; Some wear on the axle shaft, and probably combined with wear to bearing rollers, resulted in a large amount of play when lifting the axle shaft in housing. Loud enough to clunk. Doesn't look as bad as I expected though, considering how much movement there was.
Splines don't look visibly bad to me. Must need more POWER!!!
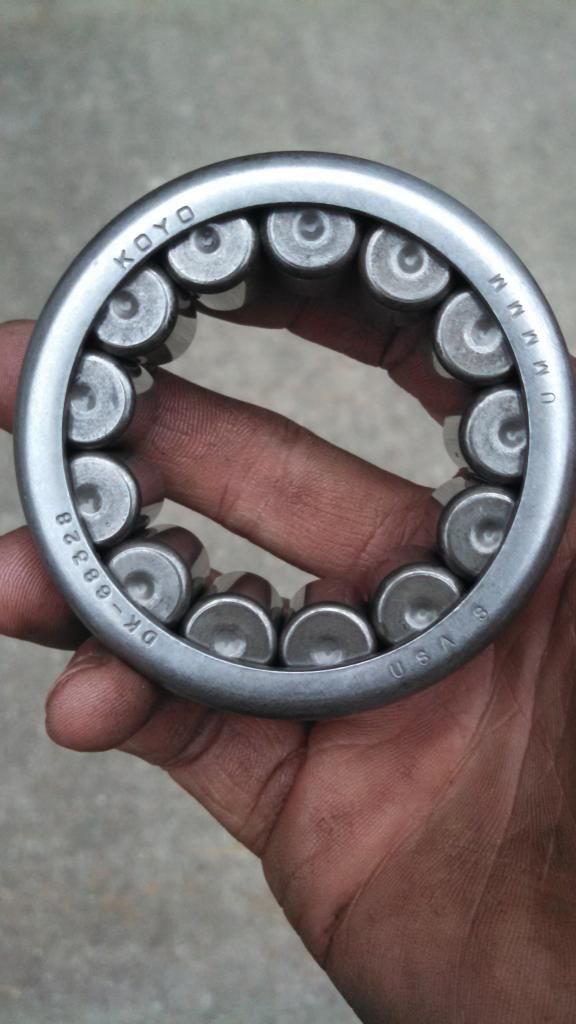
New Timken wheel bearing, apparently manufactured by Koyo.
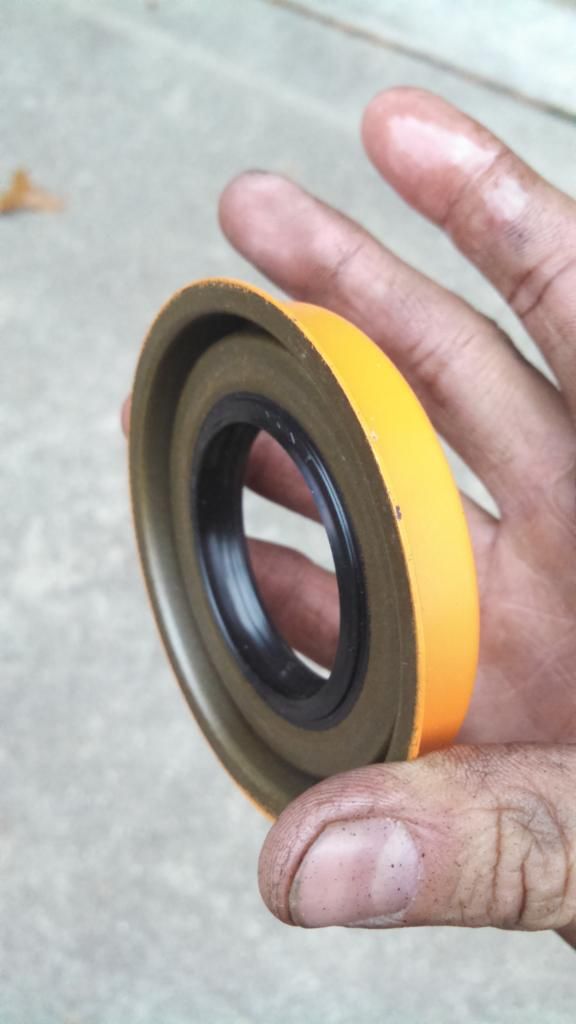
New Timken axle seal.
The outer axle bearing and seal all come out together with a couple dozen hard yanks of a slide hammer with the proper size fitting. You can remove the seal first separately if you wish but I didn't notice it helping the process.
Then you need to either use the proper size drift to hammer in the new bearing, or be VERY careful and take your time going around with something smaller to tap in the outer race evenly taking care to never hit the rollers. It will make a distinctly different sound when fully seated. Then I used a piece of wood and mallet to evenly tap in the seal flush with the housing.
- - - - - - - - - -auto merged double post- - - - - - - - - -
Axle end and backing plate after some scraping, wire brush, and fresh hi-temp paint.
Random unrelated shot; those stupid little pieces in the parking brake that always seize. This was after a lot of wire brushing on the dremel and applying anti-seize.
Used a lot of lube and 80w90 to pack bearings and make it easier to insert new axles into fresh seals without damage.
And just about wrapped up with the project.

Scraped the housing surface and TA Girdle cover to a clean flush finish and put it back on using an even bead of gear oil type gasket maker (no gasket) and tightened in a crisscross sequence up to 25ftlb, tightened the girdle studs to 5ftlb and tightened lock nuts. Added 3 bottles of Valvoline conventional (seems to be best for Trutrac) 80w90. May need to add a hair more fluid later...
Got to check my lugs after a drive to make surebstuds didn't move.
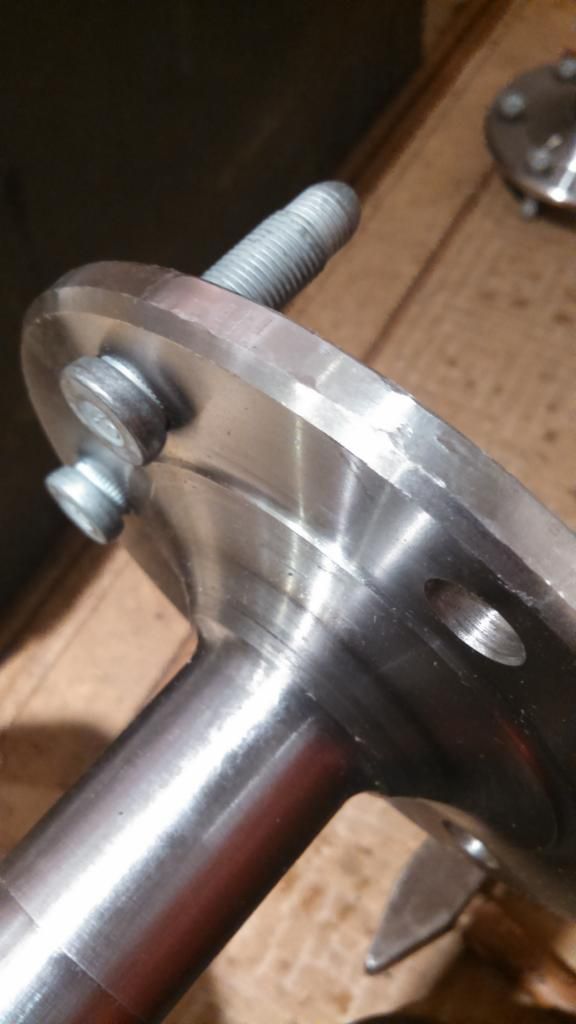
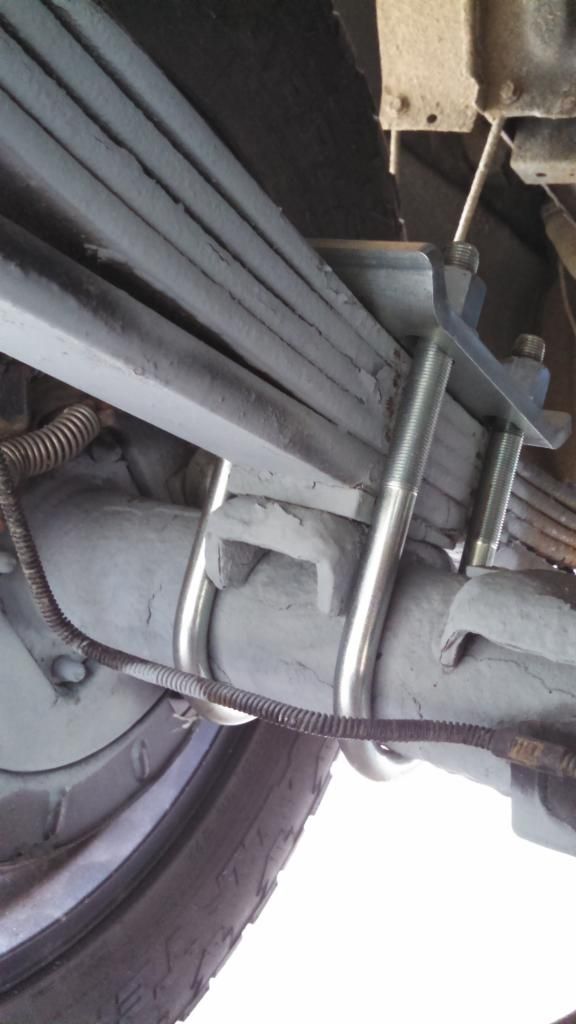
Oh, and also installed a WFO Concepts u-bolt flip kit to eliminate the stupid factory rust catcher bucket they call a bracket. Looks way cleaner too.
This was after a quick shot of primer before painting black.
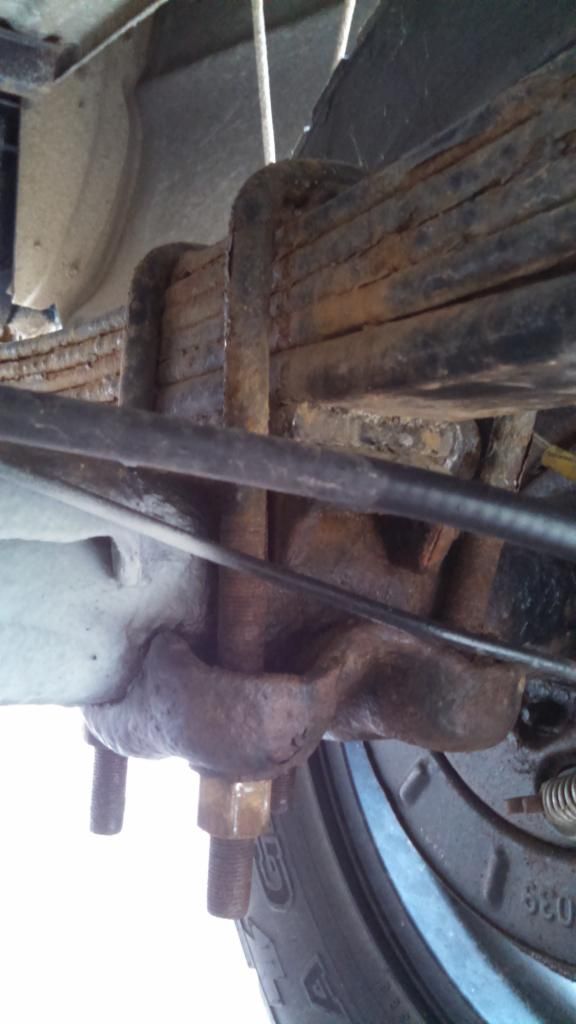
What the factory bracket looks like after 190k+ MI.
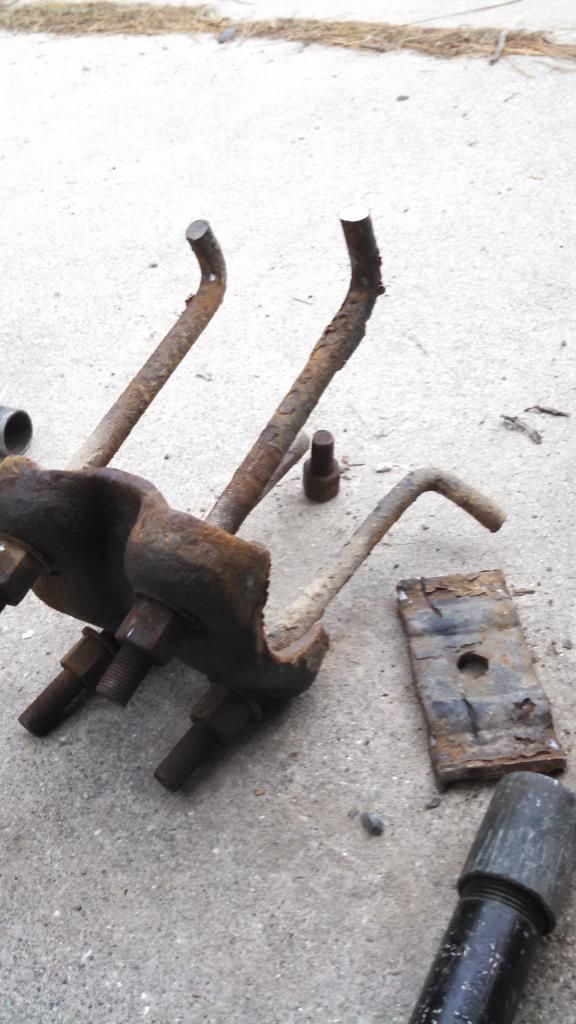
As you can see above, one of the u-bolts twisted off when in had a big breaker bar on it to break loose nuts. So, I just cut them off with a disc.
I went ahead and ordered:
- Motive Ten Factory axles #MGR-MG27129
- Timken outer bearings #TMK-513067
- Timken outer seals #TMK-4762N
And some Spicer 1330 u-joints and some other parts, but that's a different project...
Then I got caught off guard and did not realize until the axle shafts arrived that the individual Ten Factory axle shafts for this application do not include wheel studs. So, I had to run to a dealership and pick up 12 OE wheel studs. M14x1.5 and I believe approx. 58mm length and 15.88mm serration dia.
I also needed to borrow a big slide hammer with bearing fittings from a local parts store to remove the old bearings and seals. I had all the other needed tools.
And on top of that got 4 bottles (used just over 3) of Valvoline conventional 80w90 gear oil. I got the conventional for use with the Detroit Trutrac. And since I am using a TA Performance girdle cover I didn't need a replacement gasket, just some Gear oil type grey gasket maker.
On top of that, while it's all apart is the perfect time to do parking drum brakes (which are a nightmare of a horrible design...)
So here's a few pics I took while doing this. Didn't document the whole process, mostly just things I wanted to have a record of or remember. Forgot to take pics of some key things like the slide hammer, but oh well.
First you have to drain the fluid and pop off the diff cover. I did not take photos of this because it is straight forward and simple.
Then you'll have access to the carrier. This is a Detroit (Eaton) Trutrac, so it will look different than a factory g80...
Already pulled the ID lockring circlip and the cap cover from the carrier. This is using a magnet stick to remove the spacer that holds the axles out on a Detroit Trutrac (will look different with a g80, etc)
With that removed you can push the axles inward (yes even with rear brake rotors still on!) far enough to access the C-Clips on each axle.
After you remove C-clips (and with disc brake calipers removed, the axle shafts are completely free onslide out)
Empty carrier showing splines after axle is removed.
Quick video of that process after removing locking that holds cap in.
VID_20141030_145647_817_zpskcugfn4h.mp4 Video by bikesatori | Photobucket
C-clips a little worn...
Motive Ten Factory axle shaft for 99-05 GM 1500 with 30 spline 8.5/8.6 10-bolt.
Slight differences in axle from GM OE piece.
Axleshafts did NOT come with wheel studs. Ended up purchasing 12 new GM OE studs from a dealership instead of getting dormans.
Installed studs by setting in place with a few straight whacks with a mini sledge, then seating flush with a spacer, a lug-nut, and a Milwaukee Fuel impact.
Here was the condition of my parking brakes. Beautiful.
Outer axle seal and bearing.
Through the tunnel.
What initially provoked me to do this swap and upgrade; Some wear on the axle shaft, and probably combined with wear to bearing rollers, resulted in a large amount of play when lifting the axle shaft in housing. Loud enough to clunk. Doesn't look as bad as I expected though, considering how much movement there was.
Splines don't look visibly bad to me. Must need more POWER!!!
New Timken wheel bearing, apparently manufactured by Koyo.
New Timken axle seal.
The outer axle bearing and seal all come out together with a couple dozen hard yanks of a slide hammer with the proper size fitting. You can remove the seal first separately if you wish but I didn't notice it helping the process.
Then you need to either use the proper size drift to hammer in the new bearing, or be VERY careful and take your time going around with something smaller to tap in the outer race evenly taking care to never hit the rollers. It will make a distinctly different sound when fully seated. Then I used a piece of wood and mallet to evenly tap in the seal flush with the housing.
- - - - - - - - - -auto merged double post- - - - - - - - - -
Axle end and backing plate after some scraping, wire brush, and fresh hi-temp paint.
Random unrelated shot; those stupid little pieces in the parking brake that always seize. This was after a lot of wire brushing on the dremel and applying anti-seize.
Used a lot of lube and 80w90 to pack bearings and make it easier to insert new axles into fresh seals without damage.
And just about wrapped up with the project.
Scraped the housing surface and TA Girdle cover to a clean flush finish and put it back on using an even bead of gear oil type gasket maker (no gasket) and tightened in a crisscross sequence up to 25ftlb, tightened the girdle studs to 5ftlb and tightened lock nuts. Added 3 bottles of Valvoline conventional (seems to be best for Trutrac) 80w90. May need to add a hair more fluid later...
Got to check my lugs after a drive to make surebstuds didn't move.
Oh, and also installed a WFO Concepts u-bolt flip kit to eliminate the stupid factory rust catcher bucket they call a bracket. Looks way cleaner too.
This was after a quick shot of primer before painting black.
What the factory bracket looks like after 190k+ MI.
As you can see above, one of the u-bolts twisted off when in had a big breaker bar on it to break loose nuts. So, I just cut them off with a disc.
Last edited: